Wednesday, December 27, 2006

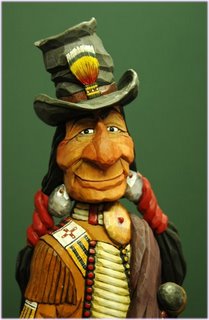
Let's Carve This Fella.....Part 2 - The Head & Hat!


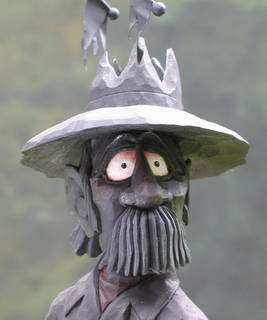
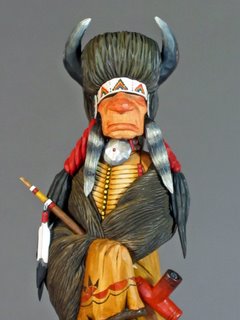
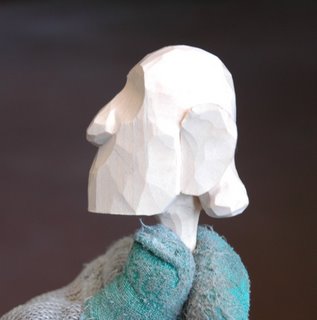
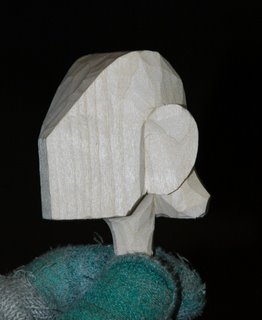
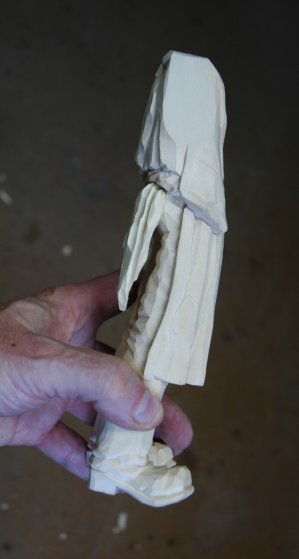
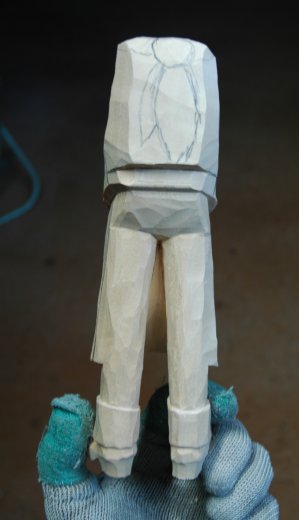
Now that we have the Body of the figure almost completed we can begin on the head and hat. Notice I said the body was "almost" completed. We still have to match it to the head! Remember that it's cold out there so we want his head pulled down into the blanket. To do that will take some extra fitting.

There are a ton of photos associated with this post as I wanted to really go over a number of steps which, I think, really make a good character. Even though we're carving a caricature, facial structure is just as important as when carving a realistic figure. There has to be bone struction to support the features and I'll explain and show this as we move through this lesson.

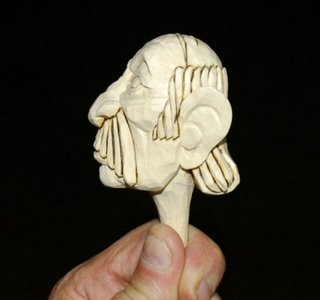
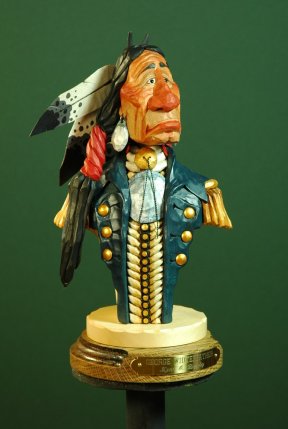
One important thing about this carving....As he is cold and sad we want the weight of the snow and his other worries to really bear down on him. To show this all lines on the face will curve downward, i.e., the eyebrows, the eyes, the mouth. Even the brim of the hat and the direction of the hat's tip amplify this mood.

As indicated on the original drawing the braids and hat are done seperately as are the feather and the two little ear rings. The braids will be epoxied in place and then carved. The feather and ear pendants will be carved and then glued in place once the figure is painted.

So, we've got lots of ground to cover so we'd better get started!!

Friday, December 01, 2006

Hey! Let's Carve This Fella and Make Some Snow!


As several carvers have ask me to do a post on carving this character I thought I'd just do the whole thing all over again from the beginning so you can follow along and make one of your own.

First, let's see just what the action is with this poor fella standing out in the reservation snow. It's pretty cold outside so he has wrapped himself up in his Government issued blanket. His right arm comes up across his chest and holds the blanket on his left shoulder. You can see his beaded mocs and the top hat he was fortunate enough to trade for. He's added a beaded strip and an eagle feather to spruce it up a bit. Still, as this months beef issue is late as usual he's not to happy about facing the wife once he gets back to the Tipi and she finds out that it's fry-bread for dinner and nothing else. Poor fella!

I've purposely kept this figure as simple as possible as I wanted to concentrate on the painting and snow techniques. We'll do the top hat and braids separately to make it even easier. Doing the braids separate will let us keep them down tight against the blanket so they look natural. I've drawn out the front profile only as I think you can figure out the side by yourself. The body without the head is 8" tall and 3" wide. You can resize it if you want but this size makes a nice little presentation.

As I've done this character already don't be surprised if this one will be a little different. That's okay! Even I don't like copying my own work! A little change here and there will make the new one unique from the old and that's always a good thing to strive for. Also, I've figured out a better and much easier way to make the snow base. So, let's get started.

Tuesday, November 28, 2006

Making A Base For Your Carving!


Just as a picture or photograph needs a frame to make it look good, a carving needs a base to really set it apart. The following steps will show you how I go about making a simple base for one of my figures. Although it might look a little complicated at first after you do it a couple of times it's really a snap to do. I hope it's helpful to you.

Tuesday, November 07, 2006

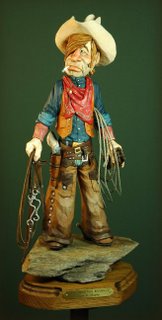
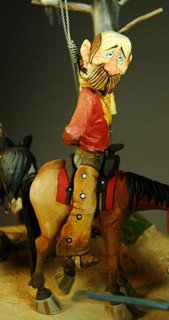
Rocky Mountain Wrangler


Here is my latest piece. I had hoped to get him completed before the woodcarving show in Dayton, Ohio but it was not to be. I'll post the painted photos once I get back.

He is mounted on a piece of the Rockies that my wife and I picked up while on a drive through the Rocky Mountain National Park this past September. I drilled the mounting holes into the rock with a carbide bit and he will be epoxied in place once he's painted.

To get the lasso under his left arm I did the arm as a separate piece, carved a notch for the rope and then epoxied and glued everything in place. Once everything had dried I carved the epoxy that had squeezed out to match the wooden surface. A nice looking effect. He's holding his gloves in the left hand and in the right his mounts bit, headstall and reins. Once he's painted the rock should really stand out.

I did forget a small item on this piece and if someone guesses it I'll confess what is missing. Otherwise, it will remain unknown. Let's see how sharp your observation is. (No...it's not the buttons on his vest or shirt...I'll paint those on later.)

Update: Here's the piece completed. He turned out pretty nice but I'm not completely happy with his pose. He could have appeared a lot more relaxed if his arms were hanging not so far forward. While arms have a natural bend at the elbow when hanging relaxed at the side they don't project forward as much as they do in this piece. Oh well.....it's a learning process so I'll remember this when doing any future pieces.

The part that I forgot has been added on as his gun would be useless with out some bullets.

More photos in the gallery.

Friday, October 27, 2006

Charlie Red Hawk


Who says carvings of Native Americans are always frowning? Charlie Red Hawk ought to help put those thoughts to rest. He's a good natured fella on his way to the Ottawa Stomp Dance being help at the new dance grounds outside of Wyandotte, OK. The old grounds are being replaced by another Casino. Maybe that's why he's smiling. They say those casinos are "Red Man's Revenge".

There are photos of Charlie naked and then decked out in all his colors. He really turned out good. I love painting Indians as you can add just about as much color as you want and it all looks good. I've used this basic blanket-wrapped body shape over and over and it always looks different than the last time. I really like the crumpled hat as it gives him a lot of character.

Tuesday, October 17, 2006

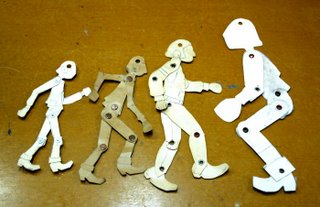
Making Paper Manikins


Several carvers have ask me how I develop characters and what tools I use to help me transfer the idea from paper to wood. Probably the main one is a simple paper manikin.

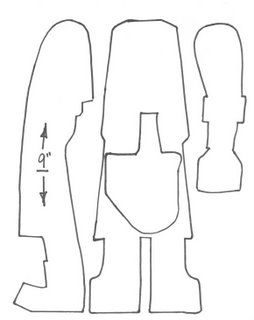
As you can see by the photo, I have many different sizes depending on the project. They are very easy to make as you can see by the attached photos. The only materials needed are a file folder and a wife's grommet maker. Also, if you're lucky like I am, you'll have two visiting Grandkids to make the job a little easier and much more enjoyable. How often does Grandpa get the chance to show off his paperdoll making skills.

You can use the photo showing all the different pieces to make any size you want. Just copy it off to a wordprocessing page and blow it up or reduce it to the measurement of your figure.

Monday, October 16, 2006

Palo Duro Cowpuncher


In getting ready for the upcoming Dayton, Ohio Woodcarving Show I just completed this figure for the over 15" category. He measures about 18" without the base. I used a piece of Caprock from the Canyon to tie the base into the theme of the carving. These gypsum deposits run all through canyon and my wife and I picked up a supply while on a trailriding trip with our horses last September. I epoxied a 1/4" bolt into the bottom of his feet after I removed the bolt head. It then runs down through the stone into the base and is bolted on from underneath.

I tried something different with this figure as you can see in the two closeup photos. Once he was painted and varnished I mixed up a little clear epoxy and put a drop on the pupil of each eye. Using a toothpick I carefully created a cornea, or bump, on the iris of each eye. You have to be careful as you don't want to scratch the paint underneath. And if you try this don't cover the enntire eye, just the iris. Go over to the Google search bar and type in "Cornea" and you'll see the "bump" I'm talking about. Also, if you do this DO NOT paint in a little white dot or highlight on the eye. That will destroy the effect.

It's really amazing the effect this has on the eyes. They actually look fluid. The rounded, crystal clear dome catches the light from various sources and the highlight moves as the figure or those sources move. Neat! I used to use a similar technique by putting a drop of nail polish on the little songbirds I used to carve. Everyone thought the eyes were glass but they were just nail polish.

As I've said before, it's the opportunity to try new things that make this craft so enjoyable. I can't wait to do a smaller figure to see if this new technique works as well as it did here.

Tuesday, October 10, 2006

Trouble On The River!


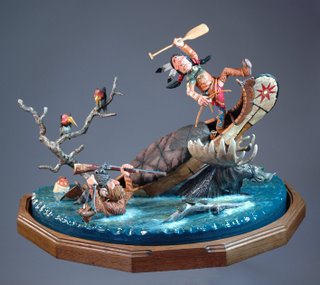
Here is my latest scene in the finished state. I have to admit it turned out pretty well. Attached are a lot of photos from all sorts of angles and closeups galore. I hope you enjoy looking at them as much as I had making this piece. The big test will be the Dayton, Ohio show. However, your comments are appreciated too.

Saturday, October 07, 2006

Sinking A Canoe!


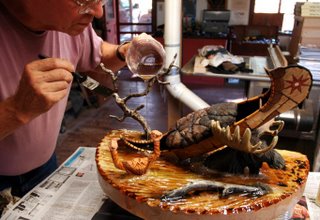
Now here's something a little out of the ordinary. I'm working on a scene that involves a Mountain Man and his Native American partner having a little trouble on the river while on their way to Rendevoux. Their canoe is in the process of sinking due to passing over a Moose in the river. Lots of action here and the chance to do a water feature. I explain the process so far in the attached photos and will add to the album as the water is painted and a final coat of epoxy resin is applied to finish it up.

Thursday, September 28, 2006

"Should We Read Him His Rights?"


Poor old Alkali Jones. He should have known better than try to sneak that heifer past those two ranchers. At least one of them is having second thoughts about whether they should go ahead and string him up so maybe there's still some hope for him. Unfortunately, we'll never know.

This was a real fun scene to construct. I had carved the steer earlier for the Auctioneer scene in the previous post. However, once that scene came together it became apparent to me that the cow was too small next to the other figures. As I had already carved Alkali Jones I just added the Longhorn as evidence of the crime!

These figures are considerably smaller than those I normally carve. The Cowboy with the rifle stands about 8" tall and the overall height of the scene is about 18". While large it would still fit nicely on a desk corner or a sideboard.

The tree is a cedar branch I picked up at the National Pea Ridge Battlefield Park in Arkansas. My wife and I ride our horses over there and there are lots of dead cedar trees I use in scenes for fence posts, gates, etc. The branch that will soon support the weight of Alkali was added on and then modeled to match the larger trunk. The two vultures are held in place by metal rods which I epoxied to the branches. The Wanted sign is made out of metal. I guess poor old Alkali wasn't much of a rustler as, from it's absence on the poster, no reward was offered.

I spent an entire afternoon carving Alkali's gun and holster laying next to his hat. I had hoped to have some bullets on the belt but it just became too fragile to handle by the time I got to that step. The hat and six-shooter do a good job of filling up that empty spot.

So, the next time you're on your knees giving thanks for all your blessings, put in a word or two for Alkali. Maybe it's not too late for him to see the light and mend his ways.

Thursday, September 14, 2006

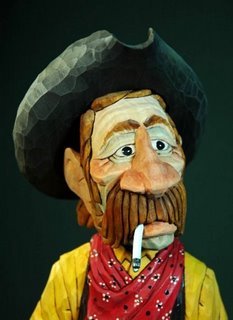
"Gus" How he got his Hat!


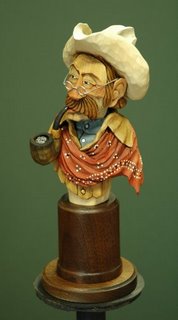
A number of you have asked me to explain how I put a hat on a Cowboy. Well, this post should answer all your questions.

First, let me explain why I do it this way. When doing a figure or bust the grain of the wood almost always runs vertically. This is great for the body and the head. Unfortunately, for the hat it presents a problem. The brim of a hat is very thin and this vertical grain will make it extremely fragile. It also prevents you from getting a real "razors" edge appearance that really looks great on a piece. Through a lot of experimenting I've come up with a solution which, for me anyway, works out perfect.

Now some of you might consider this cheating. However, I think after you review my process you'll see that doing it my way involves a lot more effort than doing it in what's considered the normal way. It gives me the effect I'm after so I'm sticking with it. Besides, a lot of people don't consider me normal anyway!

Tuesday, August 08, 2006

Road Agents at Prairie Dog Junction!


Here is a scene I did several years ago which is on display in the Out West Gallery. It depicts a holdup at Prairie Dog Junction. I borrowed the idea for this one from a Charlie Russell painting I saw at the Russell Museum in Great Falls, Montana. Lots of detail here.

The Coach was constructed using a set of full-sized blueprints. It's built to scale and even the interior is detailed with jump seats, curtains, etc. The Coach body is supported over the frame with real leather throughbraces, just like the real ones. However, I had to permanently anchor it to the frame as it wiggled during movement, again like the real ones.

The horse team is called a "Six-Up" as six animals are used. The harness is correct for such a rig as are the corresponding 'trees' which tie them all together to the wagon. From what I've read and seen it really took a lot of experience and strength to handle such a hook-up.

I've attached a lot of close up photos so you can get a real feel of the action taking place along this lonely stretch of road. One thing for sure....those little Prairie Dog's do not appreciate the load that cayuse has just deposited in front of their doorstep!

Friday, July 28, 2006

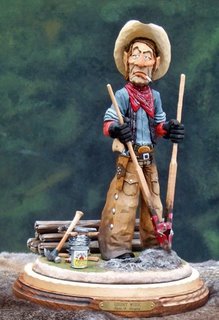
The Importance Of Details! - Grunt Work!


I have attached a number of photos of a carving I did a couple of years ago which, I think, illustrates the importance of adding details to your carvings to carry the theme of just what you're trying to capture. Having strung a barbedwire fence around our property a few years back I can symphathize with the attitude of this Cowpoke. It's not fun! However, it does make a good and amusing subject for a caricature carving.

The first step in creating this piece was the construction of the Post-Hold Diggers. I brought my diggers into the shop and worked up a cardboard pattern of the metal part of the blades. I then cut two blades out of some thin tin and bent them to shape. After whittling down the handles and putting the pieces together the thing worked just like the real one! Neat! The barbedwire was made by wrapping wire around finished spool and then adding barbs to the last foot or so. The hammer...well, it's just a hammer. The fence pliers were made to match the ones I used when putting up my fence. The staples are just bent pieces of wire and the can was made like I made the cup for the Chuckwagon Cook. The label on the can was painted and then applied.

If you could look down from the top you'd see that the hole he is digging goes down almost all the way to the bottom of the lower base. I put all the pieces together before any finish was applied and drilled the hole. I spent a lot of time on the figure to make it match the digger. To do that I carved the arms and hands separate so the hands could be rotated to match the digger. It would have been almost impossible to do it otherwise.

All in all it turned out to be a real 'classic' and was given as a Christmas Present to a Rancher in West Texas. It was kind of expensive and he kept coming back to look at it over and over during the three days we were at a show in Amarillo. About ten minutes before the show closed he came back one more time and I was sure he was going to carry it off. He didn't! However, about 5 minutes later his wife showed up and made the purchase. She later told me that on Christmas day he about passed out when he opened the box. He said it was the best gift he'd ever received. It's events like that that make carving worthwhile. Not for the money received but for the reward of something you created being really appreciated

Wednesday, July 26, 2006

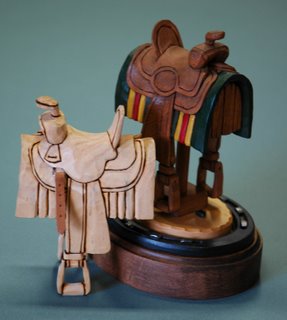
Western Saddle - The Final Touches


With this post we complete the Western Saddle. While this is a fairly easy and small project I think it makes a nice little carving to set on a shelf, table or desk. As I said earlier, there are all kinds of saddle designs so, with this basic blank you can carve just about any one of them.

The silver conchos which hold the ties are decorative nails you can find at Lowes or Home Depot. The leather I used for the ties came from a women's leather coat I bought at a thrift store back in the 70's! It's very thin and I've used it for different things to numerous to mention. Only paid $20 for it and still have enough 30 more years!

I hope you've had fun with this project. I also hope you've picked up a little knowledge about the Western Saddle, it's different parts and just how it goes together. Later on we'll try and carve a horse to put under it!

Sunday, July 23, 2006

Carving The Saddle


You will note right off that this saddle design is different from the two saddles in the previous post. Saddles, like a lot of things, come in all shapes and sizes. This saddle is known as a Half-Seat style as the stirrup leathers and fenders come up over the top of the seat jockeys. If you're wondering what all these terms mean you are just going to have to do some research. I suggest you do a web-search by typing in "Western Half Seat Saddle" and then do an Image search. You will get all kinds of photos showing all kinds of details. Just pick the ones you like. That's exactly what I did. This type of saddle isn't used much anymore. It's a true Oldtimer. By doing a Full Seat saddle you can eliminate a lot of the carved detail on the top of the seat.

There are lots of photos for this post, two pages worth! I've also been having a problem with the Album associated with this post moving around on me. So you might have to page through the entire list of albums to find it. If it's not at the top it's probably found it's way to the bottom!

The next post will deal with mounting the saddle on the base and finishing it up.

To be continued.......

Wednesday, July 19, 2006

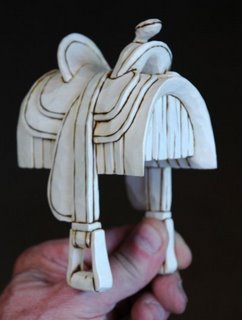
Let's Carve A Saddle!

Got that knife sharpened and ready for some carving? Okay! Let's get started!

In the photos associated with this post you will find the pattern for the Saddle to the left. I've given both the side and front profiles. It's going to take a pretty thick piece of wood so some of you might have to do a little glue-up before you start.

In cutting the blank you will need a Bandsaw that has a 6" cutting capacity. Hopefully, this won't present a problem. Also, be extremely careful when you cut this blank, especially on the end profile. A Bandsaw that is opened to accept a wide piece of wood will grab it if you aren't careful. So get a good grip on the blank and keep your fingers far from the blade. Follow my cutting process and you shouldn't have any problems.

Saddles come in many styles but as this is in the Caricature style we have a little more latitude than someone carving one to scale. Still, we want it to look like a saddle so we'll try and make sure it has all the parts a regular saddle has. I've turned the Stirrups so they hang straight to make the carving a little easier for beginners and we will make the Girth strap out of leather to keep it simple. We will also use the same style of base for the Saddle as we did on the Boots. That metal Horseshoe really ties everything together.

Now, before you begin, I'd like you to do a little homework. Go to the Google Search Window over on the right side of this post and type in "Western Saddle" and do a little research to learn about just what you will be carving. Some of you probably own horses and already know all about this piece of Cowboy gear. For those of you who don't a little trip around the Internet will give you a lot of information that will help you complete this project. Just a suggestion!

So...Let's get started!

To be continued.......

Tuesday, July 18, 2006

Don't Go Roping During A Storm!!

As I've been a little slack on my posting, I thought I'd better put something up or run the risk of losing my subscribers!
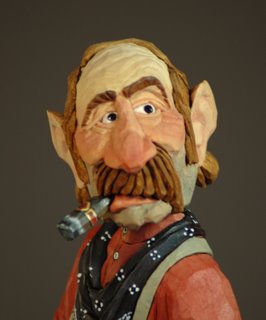
Here is a figure that everyone seems to get a kick out of. The idea came to me one day while I was setting at my carving station staring at a head I'd carved and wondering what it would look like if I took a butane torch to it. After the head was pretty well blackened by the flame the light came on and I immediately started carving the figure.

I never actually put the flame to this figure but used flat black to indicate the scorched areas. The yellow slicker was given numerous coats of gloss polyurethane to make it look as wet as possible to contrast the flat finish on the blackened areas. That technique worked pretty well. I did go ahead and paint the entire figure before applying the black so the actual flesh of the face and other areas would peek through. I placed him standing in a puddle of water, clear resin, to carry the theme as much as possible.

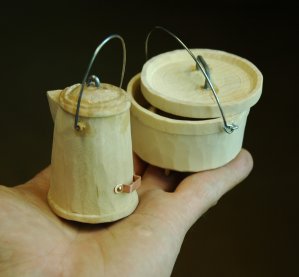
The umbrella was made from wire with the burnt cloth pieces made from pieces of copper sheeting soldered to the frame. The little balls on the ends are beads glued on. His rope is twisted wire and I dripped some clear epoxy on it so it would look like water dripping.

Wednesday, June 28, 2006

Indians!


I'm a little busy at the moment getting ready for the Eastern Oklahoma Woodcarving Show in Tulsa on July 7 and 8 so I thought I'd post some photos of Native Americans I've done over the years. For some reason, caricature woodcarvers seem to ignore this genre of figures. Maybe they're afraid of being not quite political correct. I note that you don't see too many caricature carvings of African-Americans either. Too bad. Both the Native American and the African American are rich in detail and theme.

One thing I think you'll note about my carvings of the Native American or any other class of character is that I don't make fun of them. Sure, I'll do them in a caricature style but, as I've always thought and said, you can still show a proper amount of respect toward the figure and still be amusing. A lot of carvers use a 'Mad Magazine" approach to carving, showing their figures in poses and scenes that can be in poor taste and sometimes downright disgusting. I've never seen the fun in doing that.

Anyway, here are a few Indians I've enjoyed doing over the years. I proud to say that almost everyone of them has left the reservation.

Sunday, June 18, 2006

Cowboy Boots ....Making the Mount


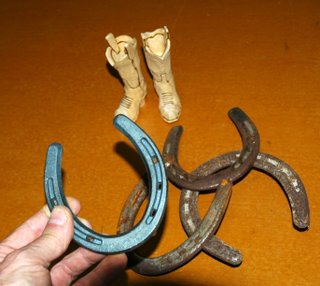
Just a few more steps to go and the Boot project will be complete. First we have to decide on a horseshoe to use. My horse Boomer was kind enough to give me one of his old ones so I will clean it up and use it. A new one will work just as well but make sure you get the proper size..."OO Lite". If you go to the Farm Store to pick one up you'll probably find three sizes: "OOO, OO and O". I'm holding a "OOO" which is normally used for Ponies. These would work great for a smaller carving. You'll need 8 horseshoe nails and they come in boxes of 100. Worse yet, they're not cheap! Maybe you can split the costs with some carving buddies!

Whichever shoe you decide on, old or new, give it a good sanding. If it's an old one clean out the holes and sand off any rust. Make sure it sets level and is not bent to an odd shape. Those Farriers really have to twist and pull to get some of those shoes off the horse.

In the photos attached to this post I explain what stains and finish I use for the wooden mounts and how to put everything together. If you want to put a Nameplate on your finished carving you can get a nice one really fast from www.signsbygwynn.com.

This project has gone pretty quick and, hopefully you now have a piece that you'll be proud to set on your desk or shelf or to pass on to a little Buckaroo you might know. For our next effort we'll try a Saddle and also use the Horseshoe as a base.

Stay tuned!

Thursday, June 15, 2006

Cowboy Boots....Finishing Up The Carving!


With this post we finish up the carving part of this project. Lots of photos to help you along. We're going to be following a lot of pencil lines with our knife blade. When you do this try and remember this basic rule in woodcarving: If at all possible, never cut straight into the surface of your carving. Just by giving a slight angle to you cut you will lessen the risk of edges breaking off or crumbling. Also, with lots of practice, you should try and make a cut a 'one time only' affair. Having to go back and redo a cut previously made will almost always weaken that area and leave you with a sloppy looking carving. Try and develop the skills of a Chip Carver who only makes the cut one time.

So, take your time and have fun!

To be continued......

Cowboy Boots....Roughing Them Out!


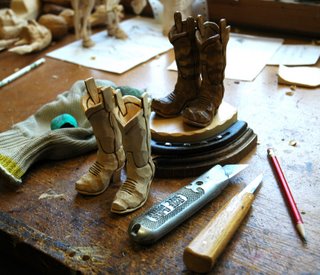
There are a lot of photos associated with this post to show you just about every cut I made on that boot blank to the left. Except for cleaning out the shaft hole, I did this entire carving with just my box knife. So, when someone brags about their $45.00 carving tool, maybe you can tell them about your $1.75 wizard!

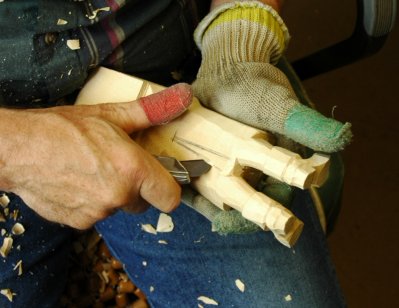
Make sure you wear a glove and thumb protector when doing this project. You'll see me switch to a new thumb guard about half way through. Protective tape is cheap compared to the pain and downtime of a bad cut so if they start to get a little thin ... out they go! Also, note the frayed ends of my gloves fingers. Imagine what my digits would look like if I forgot to slip the glove on! OUCH!!!!

So, let's get started!

To be continued.........

Monday, June 12, 2006

Cowboy Boots - Carving A Pair!


I'm going to try and keep this project as simple as possible so that a carver just starting out won't be too intimidated. We'll try and use as few tools as possible and will not be applying any paint, only stain. Once the boots are finished we will mount them on a fairly unique base.

My main tool for will be Old Reliable backed up by a carving knife with a curved blade. The curved blade will allow me to reach inside the shaft of the boot to clean it out. Other than that I could accomplish everything with the box knife.

I cut the blanks out of a 3" thick piece of Basswood. Once the profile has been cut the blank is cut down the middle giving me the two boots. Ideally, each boot blank should be at least 1-1/4" thick. The piece of Basswood the Boots set on is 1/4" thick and the Oak base is 3/4" to 1" thick.

I talked my horse Boomer into giving me one of his old shoes to use. When you go looking for a shoe make sure you get a Lite 'OO' size. Generally, shoes come in O, OO, and OOO. The Lite is a lighter weight shoe . Get you some Small horseshoe nails too. Regular nails would look kind of funny.

So, the pattern is listed in the additional photos as are a few beginning tips. So let's get started!

To be continued.....

Wednesday, May 31, 2006

Finishing Up: Apron Design and a Watch Chain


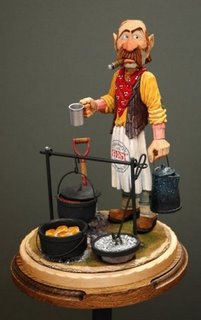
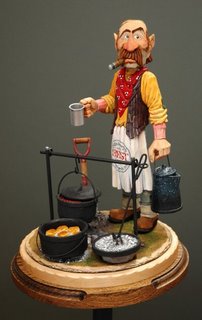
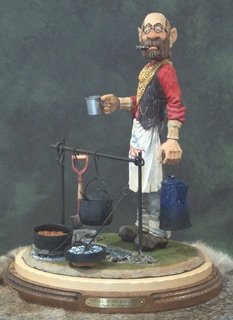
This will be the final chapter in our Cook's journey to a life on the range. So far he's endured cuts and nicks, a couple of transplants, some plastic surgery, he's even been hosed down a few times! But, here he is...looking sharp and skilled in the art of prairie breadmaking and able to cook a pot of beans as good as the best of them.

With this post we will paint the design on the apron and, as a final touch, put a watch in his pocket.

When looking for a design, I always try to locate one that would be correct for the period of the figure. In this case around the early 1900's. I found this Pillsbury logo during a search on the Net. I did away with the outer dark blue ring as it would have been overpowering. The Gold Medal Flour logo also gives good look to any cook. You could even make up your own.

Before you start with the design, go ahead and give your figure a coat of Polyurethane Satin finish varnish. When you buy varnish always try and get the smallest can available. Poly will turn an amber color and thicken over time and when it reaches that point I toss it out. On areas where the paint was heavy the varnish will shine. To prevent this I use a paper towel to carefully wipe off the excess. DO NOT USE CLOTH OR TISSUE! It will leave residue and mess up your piece.

Once the figure is dry go ahead and glue everything in it's proper place. If you think you would like to put a nameplate on the base like I did you can get a nice one, fairly inexpensively and quick, from: www.signsbygwynn.com. I use the A-30 size, double-line block for the title and script for my name.

So, that's it! I hope those of you who carved a cook will send me a photo. I'll put them together and post them here. I plan on starting a new project in the next couple of weeks and will do something aimed at the beginning carver.

Happy Trails!!!

Saturday, May 27, 2006

Painting the Body


Now we start painting the body. Here are the colors I used:

Jeans--Midnight Blue
Boots--Asphaltum (Brown) and Black
Shirt---Yellow Ochre
Vest---Chocolate Cherry (Dark Purple)
..........Irrediscent Red
Hanky-Chocolate Cherry with white highlights
Scarf--Moroccan Red
Apron-White

The attached photos will give more detail on the use of these colors.

On the cooking implements, they are painted Flat Black. I sort of winged it on the Shovel. Painted the metal parts Moroccan Red and came back with silver to indicate the wear areas. A Light Brown wash on the wooden parts. Used the button technique to paint on some rivets on the handle.

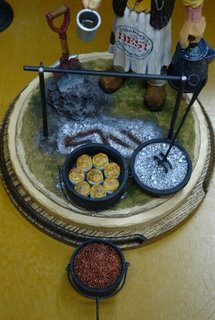
The Beans were painted Raw Sienna with Red highlights. The Biscuits were painted white and I came back and painted Yellow Ochre on the tops and then a thin wash of Raw Sienna to indicate browning. These were then glued in the Dutch Oven with a small drop of Epoxy on the bottom of each biscuit. The Coffee pot is painted Midnight Blue with the bottom painted Flat Black to indicate smoke from the fire. I then took an old toothbrush, dipped it in White and lightly flicked on some spots. Practice before doing this!!! Done right it looks just like enamelware.

Next we do the design and some final touches.

To be continued......

Friday, May 26, 2006

Painting the Head


Here is a list of the paint colors I used to do the face:

Red Iron Oxide
Yellow Ochre
Asphaltum (Brown)
Midnight Blue
Burnt Umber
Black
White

Remember when applying paint it's best to apply too little than too much. But, if you see you've applied too much, quickly load your brush with clean water and 'erase' as much as the color as possible.

Also, a very important rule is to keep your hands clean. Wash them before you start and frequently while you're painting. And, even more important still..

BE PATIENT AND TAKE YOUR TIME!

Every once in a while you will see Old Reliable in the photos while I'm painting. I always keep him handy to clean up any burrs that might show up during the process. Wetting the wood brings a lot of these out. Another benefit of wetting the wood is that it will close up a lot of the little cut lines.

Again, just take your time and have fun. Painting brings your character to life so let's make sure he has a good one ahead of him!

To be continued......

Wednesday, May 24, 2006

Down the Homestretch!

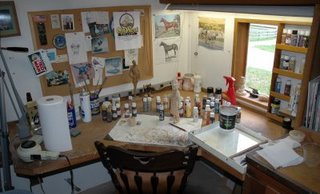
Before we get our brushes wet let's talk a little about painting. As you can see by the photo, I have an area in my shop devoted completely to painting. I realize not all of you can do this but I wanted to show the different things I use when a figure reaches this stage. Directly to the right of my chair you will see my paint box. I paint with acrylics so this box, when I put the lid on, will keep my paint from drying if something comes up to where I have to leave. You can get by without it but it's a nice tool to have. Inside the paint box I have a piece of glass which is where I mix my paints. Glass lets me see right through the different washes of paint I'm using and also lets me see how much will actually go on the figure or item I'm painting. When I'm through, a razor blade will quickly scrape off the dried or unused paint and give me a clean surface to begin again. I keep my water container in the box and my brushes right next to the glass. To the right of the box is a paper towel to wipe my brushes and a tub of Brush Soap I use to help clean out the color.

In front of the pad are the various colors I use along with a spray bottle filled with clean water. To the left is a roll of paper towels and a hair-dryer. I use the hair-dryer to speed up the drying process if needed. A heat-gun would be much too hot. The little window looks out on my Gallery parking lot just in case some customer happens by!

I have lots of different colors of paint but have come to rely on just a few. These I'll point out as we go along. I buy my paint at Hobby Lobby, Wal-Marts Craft section or could order it if necessary. I've been painting for close to 30 years using these craft paints and find that the quality is pretty consistant. Best yet....they're cheap. One thing I will recommend is that you get you some GOOD brushes. Sable hair is good. They might cost more but will last a long time if you keep them clean.

So....Let's start painting!

To be continued.....

Building A Fire


Before we begin this part of the project let's get everything ready. I forgot to take a couple of photos that would have probably made some things a little clearer but, as this Blogging is new to me, I forgot. So I'll try and explain where we should be before we start the fire.

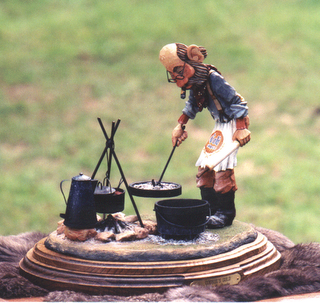
Your 3 base pieces should be complete enough to be assembled. The bottom stained and varnished, the middle varnished and the top painted and planted with grass. Now is the time to do the following:

Stack the three pieces exactly in the final position you want them. With a pencil, mark the mounting holes we've drilled onto the middle piece. Now, remove the top and mark and drill four screw holes to anchor the middle to the bottom to where the screws will not interfer with the dowels . Screw these two parts together making sure the screw tops are flush with the surface.

Now, reposition the top piece and, using some 1-1/4 inch brads, nail it into position. Place your nails in areas where they will not be seen, i.e., under the Dutch Oven, under the Cooks feet, under the rock. If you need to nail into an area that is not hidden just cover the nail head with some Mode Podge and then some grass. No one will ever know.

With the three pieces firmly together redrill all your dowel holes and the 3/16" holes for the metal uprights. You can go ahead and glue these uprights in place. Now we're ready to build the fire. The attached photos explain the steps to follow for both the fire and the coals for the Dutch Oven and Lid.

Note: See the Dutch Oven lid above? Notice the other piece of wire thats attached to the lid handle? That is a Dutch Oven Lid Lifter. You can omit this little detail and no one but an authentic Chuckwagon Cook will ever know the difference. I use them when I cook so I made one and put it in place.

Good luck.

To be continued.......

Tuesday, May 23, 2006

Scenery 101


With this post we are going to leave woodcarving for a while and concentrate on scenery. Our first step in this is to position our figure and all his cooking gear exactly where we want it. Once that is done we are going to drill 1/8" holes in the bottom of each piece as follows:

Figure...Two holes in each foot. One in the heel and one in the sole. Careful...don't go all the way through.
Dutch Oven...One hole in center .
Dutch Oven Lid...Two holes through lid and down through the carved rock.

This is all outlined in the associated attached photos.

Special Note: In doing the scenery I talk about Fine Gravel. This might sound confusing to you so I'll explain. I go down to a country road nearby and scoop up a bucket full from the side of the road. I come home and screen it till I can sift it through a piece of old nylon hose. I use this in place of regular dirt as dirt mixed with water turns to MUD. I don't want mud, I want it to retain it's texture when wet. This very fine gravel does this. It works great.

I think if you follow the attached photos you should have no problems. If you fooled around with model trains and have done some track scenery you will have no problem at all. Thats where I picked up what knowledge I have. If you want, go to a Hobby Shop and buy a book on model rail scenery. That will really put you on the right path.

If you think you need some practice before tackling this part of the project here is a suggestion...Make a small base for a single figure already in your collection that doesn't have one. This way you can practice all the steps outlined here and at the same time maybe make one of your previous carvings look even better.

In the next post we will build the fire.

To be continued.......

The Head...Completed


Like in the previous post, just continue on, taking your time. Once the head is complete, the hair lines are burnt in, being careful not to overburn. Then I lightly sanded it on the San-O-Flex wheel, keeping my thumb over the nose until the very last so not too much wood is taken off. Don't want him to have a smooth and shiney nose. The fine grit on the sandpaper lets you protect these fragile areas with your fingers or thumb without worrying about losing your fingerprints. Don't burn the eyebrows, paint will make them stand out.

As you can see by the photo I use a very simple "cartoon" ear detail. No need to go overboard. Also, insteadof spending a lot of time trying to make realistic hair with a v-tool I just indicate the direction of the flow of the hair with my knife. To me that's enough. This is a caricature.

So, the head is complete. Now the really hard work begins!! (Only kidding!)

To be continued......

The Head...Continued


With this post we are going to continue working on the head. I am not going to spend a lot of time explaining each individual cut as I think you are competent enough to handle this yourself. There are plenty of photos for reference and the next post will have even more. Just don't rush the detail and take your time.

One thing before you start.....STROP OR SHARPEN YOUR KNIFE!

Doing fine detail, like around the eyes, ears, and nose, you need a knife that has a very sharp and flexible point. This is why I like Old Reliable. It is extremely sharp when stroped a few times and the point is thin and flexible. Keep your cuts to the minimum. Like chip carving, ideally you want to make one cut and then another to let the chip fall out of it's own accord. Constantly returning to the same area will chew up the wood to the point that it will no longer hold detail. Try not to go directly straight into the wood with the knife. I find that coming in at an angle and then using another angled cut in the opposite direction makes for a cleaner cut. This is because you are not cutting directly across the grain. Naturally, there are exceptions where this is not possible. But this is a rule to follow if at all possible.

To be continued........

Sunday, May 21, 2006

A Preview


I finished up the Cook this morning. As a lot of you are having difficulty visualizing the finished product I thought it might be a good idea to show you how it finished up on my end.

I am a little hesitant to do this as I'm afraid some of you will ignore the posts still to come. But I'll take that risk. One thing I will ask is don't come at me with questions on areas that haven't been covered yet. I'll try and answer those as we move along.

So.....I think he turned out pretty good. Remember my comment earlier about plastic surgery? Well, here's the story.

I completed the head and thought it was going good. Unfortunately, once it was painted I was not satisfied at all at the outcome. Hmmmmm....what to do. Carve a new one or try and save the one I have. Could I recarve it even though it had been painted? Hmmmmmm....Well, what the H***! If it doesn't turn out it was headed for the woodstove anyway so here goes.

I shaved all the eye detail completely off the face and redid them. It worked! Later on you will be able to compare the first face with the one here. I'm not going to show you how the first one looked painted. I'll keep that secret.

To be continued......

Saturday, May 20, 2006

A Base and a Shovel


Hey! That looks pretty good! I always stop and do the base when I reach this stage of a scene. It lets me see how the whole thing will appear once it's done.

A few comments on bases...A base, like a frame for a picture, can make or break a carving. I've seen lots of terrific carvings ruined by their being placed on a lousy base or by having no base at all. I've seen some lousy carvings really shine because the carver took the time to make an impressive base. Best of all, I've seen some terrific carvings mounted on outstanding bases that seem to always walk away with the ribbons. That's what we're after here.

I use red oak, walnut, maple, cherry, any nice hardwood for the first layer of my three layered base system. I use a piece of thin basswood for the middle layer as it nicely separates the dark hardwood base from the scenic area on top. It just seems pleasing to me. I could probably get by without the basswood middle but that's the part that has my name on it so it stays! I'll stain the hardwood a dark walnut color then, when dry, a couple coats of polyurethane. The basswood just gets a couple coats of polyurethane. The top part we will scenic later on. No rush here.....just taking our time.

Carving the shovel: This should be easy for you. I went out to my Chuckwagon and used the shovel hanging on it's side as a guide. That shovel has had holes cut in the scoop so I can pick up a load of hot coals from the fire pit, give it a few shakes to get rid of the ash, and then dump them either under the Dutch Oven or on top the lid. Be careful cutting that hole on the handle.

To be continued.....

Roughing Out The Head


With this step we'll start to see our figure show some signs of life. I'm not going to spend a lot of time showing each individual cut as I think the photos pretty well show what I'm doing. Like I said starting out, it's assumed you've carved a few figures already so you should have the basics down. However, I will tell you what not to do. Here is the cardinal rule of woodcarving....

"Don't Rush The Detail!"

Take your time laying the groundwork for the detail by constructing a solid base for it. Just take your time.

I do my heads separately because this allows it to be moved to the optimum angle with the body for the best effect. Just the slightest shift of the head can change the whole attitude of a piece. You can have him looking right or left. By carving a different angle on the neck you can have him looking up or down. If the head your working on or have just finished doesn't do what you want...give him a transplant! Do some plastic surgery! I'll go into detail about the plastic surgery part a little later.

To be continued......

Biscuits, Beans and a Cup of Coffee


It's time to bake some biscuits, cook some beans, and make our tin cup so we can sample some of that Cook's campfire coffee.

The biscuit part is easy. The beans shouldn't be that difficult as you've already done similar steps when you made the Dutch Oven. For that reason I'm not going to dwell on how to make a bean pot as you should be able to figure that out yourself. You might have to raid your spice rack for some Mustard Seeds.

The Tin Cup will require some of that 7th grade metalwork training you thought you'd never use and have long forgot. A small soldering iron, solder and flux and a piece of scrap tin will get you over this hurdle. Just don't burn your fingers.

To be continued.......

Thursday, May 18, 2006

Reference Material


I've been ask how I obtain various reference material for my carvings. I have a complete library of books about the Old West that contain tons of info. However, I'm always on the lookout for more. I subscribe to a number of magazines dealing with the west, horses, western art, etc. When I see a picture of a scene I like or a piece of equipment I'll clip it out and glue it into a scrapbook devoted to a certain subject, i.e., Cowboys, Indians, Horses, etc. I have a number of these scrapbooks and they are always getting new material.

One of the most useful tools I have and use on a constant basis is my Digital Camera. As you can see by the photos associated with this post it comes in real handy. It only takes a minute to set up the pose, take the photo and have the wife run up the hill and print them out. I then have an exact reference to work from.

With Google, Yahoo and other search engines you can now find just about anything you're looking for.

The Right Arm


I did not include a pattern for the Right Arm. You should be able to make this on your own. It's the same as the left, just bent at the elbow. You can see by the photo just what we're after so it shouldn't be that difficult.

Here is where doing an arm as a separate piece becomes important. See that arrow on the arm? That indicates the direction of the wood's grain. If the arm was cut as part of the body's blank it would be running opposite of the arrow. So, when finished, it would become very fragile at the wrist and run the risk of breaking off. People have a habit of wanting to touch things, especially woodcarvings. By doing it as a separate piece we have solved the problem of it possibly breaking off.

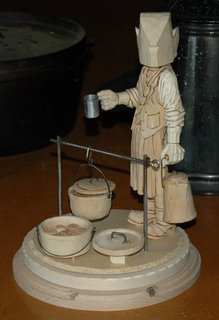
Then why did we do it on the left arm? Why not? Sure made it easy did't it. It also allowed us to get that coffee pot hanging just right. Cheating? Maybe to some. Not to me. I look at a piece of wood as if it were a block of clay. While I can take some off I can also add some back on if I need to.

When you're finished with this step the body, aside from a hole for the head, is finished.

To be continued.......

Wednesday, May 17, 2006

A Coffee Pot and a Dutch Oven


Before we add the right arm, let's go ahead and make the Coffee Pot and the Dutch Oven. These might look kind of difficult but they're really quite easy to do if you have the right equipment. Most of the work is done by your saw and a drill. Those of you who don't have access to a drill press and a set of Forstner bits can accomplish this task by cutting out the center of the oven and lid on a jig saw and then glueing in a false bottom. All the joints will be hidden.

This oven is made to accept 8 biscuits made from 5/8" wooden dowel. This is just the right size for this scene.

Note: I have edited this post for the size of the biscuits. I had originally typed 3/8" vs. the 5/8" now shown. The smaller version would work okay but the larger size looks better.

Monday, May 15, 2006

Let's Take A Break!

I've posted a number of installments and thought I'd stop for a bit to see how they're being received. I note from the photo views in the Gallery that quite a number of 'click's are being counted on the various pictures. However, I don't seem to be getting many comments. So, if you can take a moment, click on the "comment" posting area at the bottom of this post and let me know how you are doing with this project or what you think of it so far.

If you have a question regarding a certain item in a particular installment, leave a comment on that post and I will try and answer your query with a comment in the same area. I've been trying to think of everything I can pass along when I create each new post but I know I leave things out that are important to you so let me know about them. If necessary, we'll go back and review or even redo areas that might be confusing.

Okay....break's over! Let's get back to making chips!

(Ignore that 'Additional Photos" below, there are no more photos with this post.)

To be continued.....

A Hankerchief, Some Burning, and a Left Arm


In this post we're going to do some things a lot of you might not have tried yet. First will be an 'Add-On'. In this case the add-on is a hankerchief the Cook uses to wipe his hands and, no doubt, blow his nose. It's much easier doing an add-on than trying to allow for such details on a solid block. I know...some might say it's cheating. Tough!

We are also going to use a pyrotechnic pen to do some burning. If you don't have one of these pens don't worry..you can get buy without that detail and your carving will look just as good.

Lastly, we are going to carve the left arm and attach it permanently to the body. Did I hear someone cry CHEATING!!! again??? Hey..if you don't like what we're doing here go pester someone else. This is my technique, my carving and my Blog so I'll do it "MY way. I'll explain a little more why I do the arms separate in the Right Arm post.

You will also see photos of me using my Sand-O-Flex Wheel. I use this piece of equipment constantly. I have one wheel set up for my carvings and another with heavier grit paper for metal and other projects. They are invaluable to me.

You can see by the photo above that I have finished carving the boots by completing the soles and adding a few wrinkles.

This is a busy posting which will take you a while to get through. There are some different and possibly difficult steps to accomplish but just take your time and you'll make it through okay. Just remember.....CHEATING IS ALLOWED ON THIS SITE!!!

Someone ask how I come up with my ideas for carvings. Well....I love the Old West! In this particular instance, I like to think I know a lot about Chuckwagons and Cooks as my wife and I own a wagon and we cook out of it a lot. This June 10 & 11 we'll have our wagon at the Echoes of the Trail Cowboy event in Fort Scott, Kansas. The fire will be burning, the coffee hot and there will be biscuits in the Dutch Oven. If you're in the area we'd love to have you stop by.

www.cowboypoetry.com/echoes.htm

To be continued.....

Sunday, May 14, 2006

Vest, Shirt & Apron


We're going to be doing a little more detail work with this installment. Looking at the photo to the left you can see that the front of the body looks pretty well finished. The circle on the apron indicates where the design of the flour sack will go. The vest has two pockets and button holes. No buttons yet as we'll paint those in. The apron has been given folds and creases and if you look close on the right side you will see a patch near the bottom edge of the circle. I've carved in folds and overlaps on the neckerchief.

A word about detail. As our cook is from the Old West, I would suggest you do a little research into the clothing they would have worn back then. There are hundreds of websites out there you can google to see the different types. To me that's half the fun of doing a carving like this. A lot of places will send you a free catalog which is a great thing to have. I subscribe to a ton of magazines on this period that are shredded to pieces by my cutting out photos to paste in my reference books. I have also bought pieces of clothing and other cowboy tack that appear frequently on my pieces. That way I can put them on and see just how they fit in different poses. It's also fun to just put them on and play Cowboy. My horse Boomer loves it when he sees me coming with the saddle, dressed up like 'Gus' McCrae. He knows we're going to have some fun.

To be continued.....

Saturday, May 13, 2006

Cuffs, Legs, Shirts and a Little Bit Of Sanding


It's time to start getting into a little bit of detail. Now don't get too excited.....I said a little bit of detail. We're also going to get the body ready to accept the arms once we get them done. We'll be using a disc-sander. Be careful when using power tools on Basswood as the wood is soft and can disappear at a rapid rate. If you don't have a disc- sander you can still accomplish the task it just won't be as easy. The one I use is a Black&Decker benchtop version that serves me well. Sometimes I wish it was larger but not enough to run out and buy the bigger version.

Don't take any wood off his bum as we're going to do a little Add-On to his right pocket in the next post. You can see by the photo that we've really made a good seperation between the two legs. That long-bladed knife did it's duty and allowed the Cook to keep that deep growl in his voice! He's appreciative of that and might just reward you with an extra biscuit.

Remember...If you have a question regarding this part of the project, drop me a comment by clicking on the "Comments" area at the bottom right of this post.

To be continued......

Wednesday, May 10, 2006

Roughing Out The Legs & Vest


Now that we've got the feet and lower legs established, it's time to open the area between the legs. You can see where I've penciled in the opening up to the bottom of his bum. While I'll use Old Reliable to make the first cuts I'll switch to a knife with a 2 inch blade to get further inside. I also used a small Flex-Cut gouge to widen this area. You can see in the photo that the feet and legs are now clearly indicated but they still lack any detail. That's just as it should be.

One of the biggest mistakes carvers make is the rush to detail. You can't build a house without a firm foundation and carving is no different.

The captions beneath the additional photos associated with this post should explain what I'm doing so I'll sign off and go watch the PBS Special on the Duke and John Ford.

To be continued........

Let's Get Started!

To begin with a word about safety. Make sure you wear a Carving Glove and a Thumb Protector before attempting this project. The last thing I want is for someone to get hurt. A little bit of protection now could save you from a lot of pain and grief later on. Also, this project is not meant for a beginning Carver. My comments are going to be made with the understanding that you already have a solid grasp of the basics of woodcarving. A lot of the techniques I'll use might be new to you but, hopefully, we will work through them.

One more thing before we start. I've never attempted anything like this before so as the saying goes...Be patient with me! If you have a question put it in the Comments section and I'll try and answer it. Also, remember that I'm typing these comments as I'm doing the carving so I'm in the dark as much as you about how this thing will turn out.


Okay! Here's the pattern for the Cook. While the outlines for the Head and Arm are given don't worry about those for the moment. We're only concerned with the body right now. Click on the "Additional Photos" caption at the bottom of this Post and it will take you to the photos associated with this posting. Copy the Pattern photo to your computer and enlarge it to the size indicated. This will give you the templates you'll need but cut the body. Lay it out on your block with the grain running in the direction of the arrows. Cut the Side profile first then the front.

My tools. Yes, that's a box knife! I have used this tool for years to the point that it has become my "Old Reliable"! Everybody thinks I'm nuts for using it and maybe I am. All I know is that it works for me and thats whats most important. I also use the "normal" carving knife when called for so if you have a favorite knife like I do use it. If you prefer to use gouges and chisels then use them. As we go along you'll see me using other tools but, for the moment, I'll start with these.

There are captions under the photos to explain what I'm doing. Again, if you have to ask questions about basic carving techniques this project may be too advanced for you.

To be continued...........


Tuesday, May 02, 2006

Carving the Chuck Wagon Cook - A Little Background


This will be the first project. I choose this character as he is pleasing to a wider variety of viewer or prospective buyer than just a cowboy. Also, as there is a lot of detail on the figure and all his associated cooking gear. This is going to be FUN! You'll learn how to make a real Tin Cup, A Coffee Pot, Dutch Oven with Biscuits and a pot of Beans. We'll create dirt, plant grass, dig a fire hole and build a fire.

First off, let me dispel a myth that seems to be accepted as fact about the Chuck Wagon Cook. Most movies, books or TV show the Cook as a greasy, unkept character most people wouldn't let onto the Ranch property, let alone into the kitchen to cook their food. In reality, a Ranch owner, to ensure he has a happy, well fed crew to do his work, would look for the best cook he could find. The best example of this would be in the movie "The Cowboys" starring John Wayne. Remember when the Duke asks Roscoe Lee Browne, who plays the prospective cook Jededia Nightlinger, what he can cook and he rattles off a list and ends with Apple Pie that would make you "Want to slap your Mama!". I guess because she couldn't even cook that good. So the next time you watch "Monte Walsh" with Tom Selleck, and you see that filthy, disgusting looking Cook, don't believe a word of it!

My First Post


Okay Folks! Let's see if we can bring Western Caricature Carving into the age of the Computers! I had originally thought of doing a book but I think this format is much more user friendly, at least to the person doing the work. I can update it as I go along and be as wordy as I want. I can also post as many photos and other related info, links, etc., as I want without having to worry about the length of a project. Also, it won't cost those interested anything! A free instruction book! Maybe we'll start a trend. So we'll see how it works out. If it does....Great! If it doesn't......no big deal.

So......as soon as I get started on the first project I'll let you know. Should be soon as I already have a few photos to post.

TTYL