
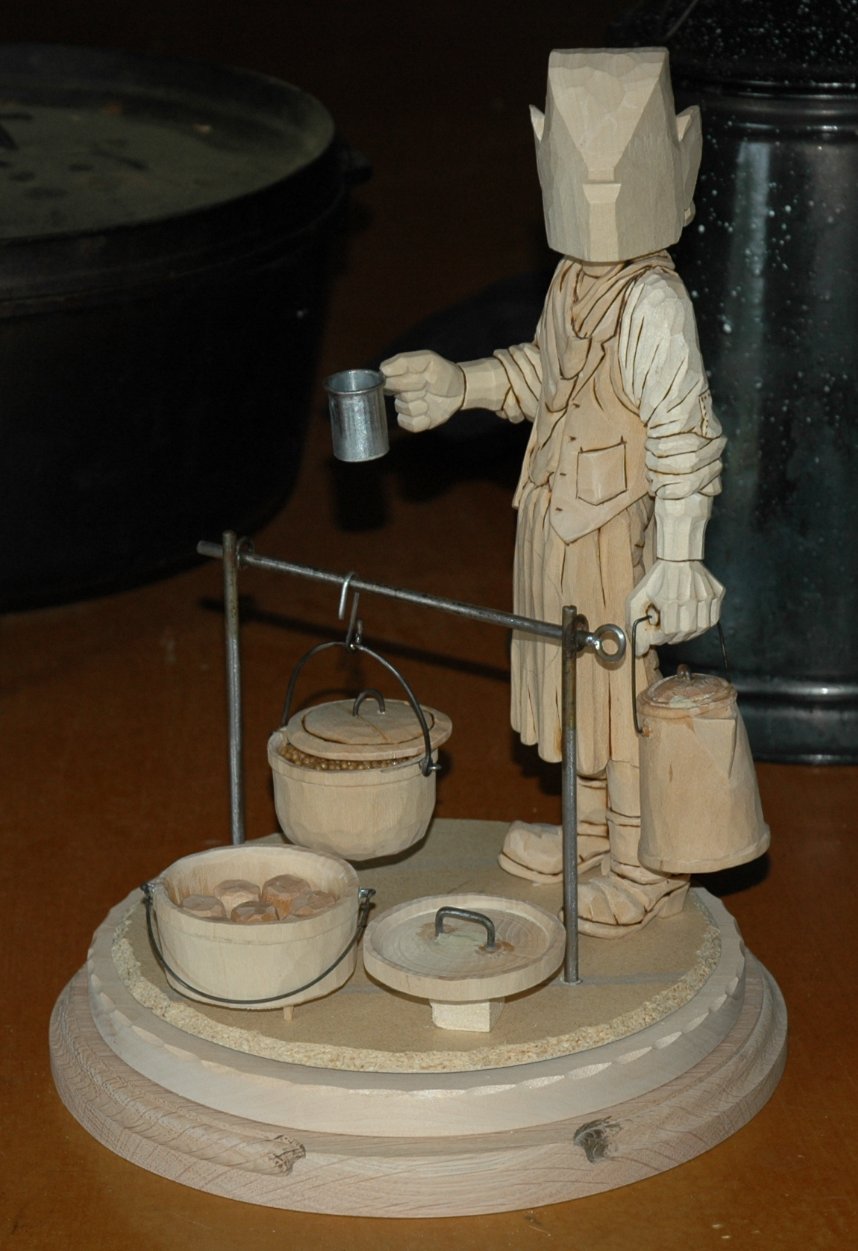
Hey! That looks pretty good! I always stop and do the base when I reach this stage of a scene. It lets me see how the whole thing will appear once it's done.
A few comments on bases...A base, like a frame for a picture, can make or break a carving. I've seen lots of terrific carvings ruined by their being placed on a lousy base or by having no base at all. I've seen some lousy carvings really shine because the carver took the time to make an impressive base. Best of all, I've seen some terrific carvings mounted on outstanding bases that seem to always walk away with the ribbons. That's what we're after here.
I use red oak, walnut, maple, cherry, any nice hardwood for the first layer of my three layered base system. I use a piece of thin basswood for the middle layer as it nicely separates the dark hardwood base from the scenic area on top. It just seems pleasing to me. I could probably get by without the basswood middle but that's the part that has my name on it so it stays! I'll stain the hardwood a dark walnut color then, when dry, a couple coats of polyurethane. The basswood just gets a couple coats of polyurethane. The top part we will scenic later on. No rush here.....just taking our time.
Carving the shovel: This should be easy for you. I went out to my Chuckwagon and used the shovel hanging on it's side as a guide. That shovel has had holes cut in the scoop so I can pick up a load of hot coals from the fire pit, give it a few shakes to get rid of the ash, and then dump them either under the Dutch Oven or on top the lid. Be careful cutting that hole on the handle.
To be continued.....
I haven't had time to start the carving, yet, but I have sure enjoyed stoping by everyday and reading the posts and looking at the Photo's
ReplyDelete