
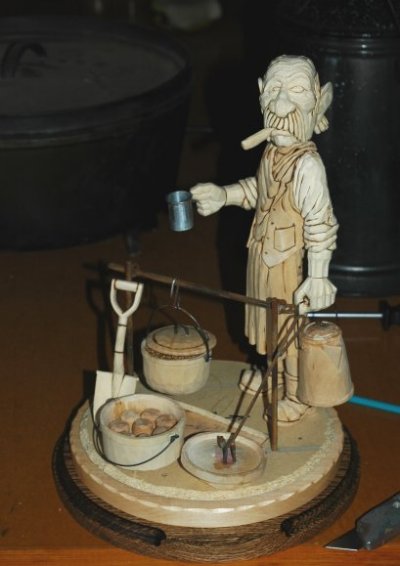
With this post we are going to leave woodcarving for a while and concentrate on scenery. Our first step in this is to position our figure and all his cooking gear exactly where we want it. Once that is done we are going to drill 1/8" holes in the bottom of each piece as follows:
Figure...Two holes in each foot. One in the heel and one in the sole. Careful...don't go all the way through.
Dutch Oven...One hole in center .
Dutch Oven Lid...Two holes through lid and down through the carved rock.
This is all outlined in the associated attached photos.
Special Note: In doing the scenery I talk about Fine Gravel. This might sound confusing to you so I'll explain. I go down to a country road nearby and scoop up a bucket full from the side of the road. I come home and screen it till I can sift it through a piece of old nylon hose. I use this in place of regular dirt as dirt mixed with water turns to MUD. I don't want mud, I want it to retain it's texture when wet. This very fine gravel does this. It works great.
I think if you follow the attached photos you should have no problems. If you fooled around with model trains and have done some track scenery you will have no problem at all. Thats where I picked up what knowledge I have. If you want, go to a Hobby Shop and buy a book on model rail scenery. That will really put you on the right path.
If you think you need some practice before tackling this part of the project here is a suggestion...Make a small base for a single figure already in your collection that doesn't have one. This way you can practice all the steps outlined here and at the same time maybe make one of your previous carvings look even better.
In the next post we will build the fire.
To be continued.......
Great idea Bill. Looking forward to seeing your piece.
ReplyDelete