
Just a couple more photos in the Gallery. Hope you like this one too. Now I've got one more to clear the table that still needs a hat so it's off to the workshop!


 I think he turned out really nice and the addition of the shield worked out just as I thought it would (personally, I think the shield is the best part of the piece!) There are more photos in the Gallery and I'm proud to say that he sold immediately.


.JPG)

.JPG)


.JPG&container=blogger&gadget=a&rewriteMime=image%2F*)
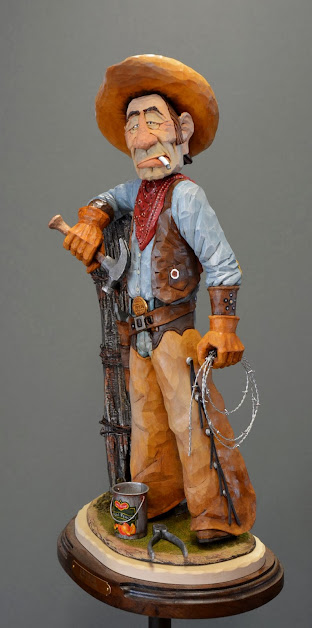
.JPG) We had a great time at the show. While the table count for the show was down for the reasons I explained on the "Out West Woodcarving Posse" Facebook page, it was still a success for us. I managed to take Second Best of Show for my newest piece: "Big Bear"which also took First in the caricature bust category. "Looks Like A Good One" took first in caricature full figure. "Chicken Catch-a What?" came in second in the full figure group and "A Little Off the Top" was number two in the bust bunch. "Looks Like a Good One" sold before the show even started so and a small Native American bust sold in the Purchase Award group on Sunday.
We had a great time at the show. While the table count for the show was down for the reasons I explained on the "Out West Woodcarving Posse" Facebook page, it was still a success for us. I managed to take Second Best of Show for my newest piece: "Big Bear"which also took First in the caricature bust category. "Looks Like A Good One" took first in caricature full figure. "Chicken Catch-a What?" came in second in the full figure group and "A Little Off the Top" was number two in the bust bunch. "Looks Like a Good One" sold before the show even started so and a small Native American bust sold in the Purchase Award group on Sunday. .JPG)

.JPG)

.JPG)


.JPG)

.JPG)
.JPG)


.JPG)