Now for some burning. I’d didn’t do the whole figure but did hit all the areas so you can get an idea of how I go about it. In the next segment we’ll start painting.

Wednesday, September 28, 2011
Tuesday, September 27, 2011
Muy Caliente! - Part 14
At last! With this one we finally wrap up the carving part of this project. I don’t know about you but I sure am glad this part is behind me. Next up is the painting and that will be fun to do.
Monday, September 26, 2011
Muy Caliente! - Part 13
With this one we start the second try on the left arm and hand…this time holding a plate. I think you will find this one quite easy to do compared to that mountain we had to climb with the bowl. Hopefully, please God, Part 14 will be the end of the carving part of this series and we can start painting which I’m really looking forward to. I’m going to try and have some fun filling that plate with some south-of-the-border cuisine of the hot variety. See there…..not only are you hopefully picking up some carving tips but soon we’re going to be running competition with the Cooking Channel!!! Ay Carumba!
Graduation Day? I'd Say So!

-
Nice work Glenn!

Sunday, September 25, 2011
Muy Caliente! - Part 12
ROADBLOCK!!! Yep, we hit one. As occasionally and sometimes always seems to happen when doing something from scratch you hit the wall. This happened as I was carving the hand holding the bowl. While I made it through the problem it took me about 3 hours to do it and could have been a complete video series on it’s own. Well, I don’t want you to face this problem if I can help it so I will look for a different and easier way to accomplish this part of the project with basically the the same result.
Thursday, September 22, 2011
Muy Caliente! - Part 11
Forgot……I had one more. This will take care of the right arm. Now that was one mountain to climb but we made it will a lot of adjustments not to mention a dose of profanity! At least the fella didn’t go sailing across the shop as some have! Anway, we’ll start the left arm in the next one.
Wednesday, September 21, 2011
UP & AT EM!

-
Hope you like him and there are more photos in the Gallery.
Tuesday, September 20, 2011
Muy Caliente - Part 6
Here’s Part 6……we’re really moving along now. Hopefully Part 7 will be up this evening.
Monday, September 19, 2011
Muy Caliente! - Part 5
Here’s part five. We start the main body so some heavy carving is ahead for us. Have fun!
Saturday, September 17, 2011
Muy Caliente! - Part 4
We wrap up the head with this segment and I get a little preachy about my pupils! Not you folks but about the way some paint their eyes. If you’ve watched a lot of these videos you probably know by now that I have definite opinions about certain things. Anyway, now I have make the hat and start figuring out the type of body we’re going to stick this head on.
Thursday, September 15, 2011
Muy Caliente! – Part 3
The addition of that piece of wood was a great success so now I can look forward to the next problem. It’s things like this that add a little spice to your day. The head is well on it’s way and we should be able to finish it up in the next segment.
-
Oh, before you ask……No! I wasn’t in the Air Force. Our youngest son was though and retired a couple years ago. It was the US Army for me as it was for our oldest boy.
Wednesday, September 14, 2011
Muy Caliente! - Part 2
Well……Judy read me the riot act after filming this one. Seems I was jerking that head around so much she was having a hard time following it. I apologize and promise I will try to keep it in the frame but a guy has to see what he’s doing don’t he?
-
First, a special note! You might want to wait till Part 3 is up before starting to whittle along with me on this one. I was not satisfied with the cheek bump so I performed a little facial surgery to increase the material to allow for a larger bulge. I’ll explain what I did in the next video. . If it works great! If it doesn’t I’ll be back to square one.
-
One thing I noted when watching the video is that some might find it a little boring as I take off a chip or two then stop for a look then take off another chip or two then take another look and then continue on. Well, that’s the creative process at work and I’m not going to edit it out as I think it’s important to see the entire process from the smallest chip to the larger one.
-
Monday, September 12, 2011
Muy Caliente! - Part 1
Quite a few of you have been asking when the next video series will start. Well, here's the first part of one that should be a lot of fun. I explain what I hope to do with this one in the video so I won't repeat that here. Some of you will recognize certain parts of the upcoming figure but we'll put these parts together a different way to make this carving as unique as those others were. So, go get a good piece of basswood and a sharp knife and let's have some fun.
The Dog Soldier

-
I'm not really sure just how many feathers are in his headdress...at least 150. I had originally placed about 130 and then noted a couple spaces hat could use some extras. Of course everything was already glued in place and as those feathers are longer than the drill I had to make an extended drill to get into the narrow spaces. I did this by using some brass brazing rod I had on hand. I think it was about 1/16". When inserting and anchoring them in place I was worried that regular carpenters glue would dry visible so I went to Lowes to get some of that dark carpenters glue. Evidently they don't make it anymore but I did find a new transparent wood glue that, after running a little test found that it dried completely clear and seemed just as strong as the other. I just might permanently switch to that type for everything.
-
One thing I think will be necessary for this piece is a display case. I had hoped to find a glass globe that would work but they were either to short or too tall but I did find a Plexiglas cube that should work so will go with that. Even with that I'll have to come up with some way to anchor it inside the cube to keep it from sliding should the cube get bumped.
-
This has been a very satisfying project and one that should really be a hit in Dayton, at least I hope so. There are more photos in the Gallery and as always, your comments are welcome and appreciated.
Friday, September 09, 2011
Cheyenne Dog Soldier - First Feathers In Place

-
More photos in the Gallery.
Wednesday, September 07, 2011
A Couple of Carving Meeting Results.


Cheyenne Dog Soldier - Just A Few More Details

-
The tip of the lance is pounded copper with gives it the appearance of a flint spear point. I will add some feathers to the top and bottom areas and also do some feather and hair decoration on the shield. Not really sure if that shield design is one a Dog Soldier would use but I like it and once the detail is added it ought to look real snazzy.
-
So, after I finish my baloney sandwich it's back to the shop to pluck some feathers! More photos in the gallery.
Sunday, September 04, 2011
Cheyenne Dog Soldier - Almost Done

Cheyenne Dog Soldier -Roughing It!
Saturday, September 03, 2011
The Road Agent - Finished

-
This has been a real blast to carve and the scarf turned out really well. As I mentioned earlier I kept the colors as dark as possible to carry the mood of this nasty outlaw. If you zoom in on his eyes I added a little red at the corners as he probably has trouble sleeping, worrying about some law dog hot on his trail or maybe he just drinks a little too much Red- eye.
-
Anyway, I hope you like him and hope you'll stop by an check him out in person in Dayton. Just make sure you keep your hand on your wallet!
-
Lots of photos in the Gallery and your comments are welcome as always.
Thursday, September 01, 2011
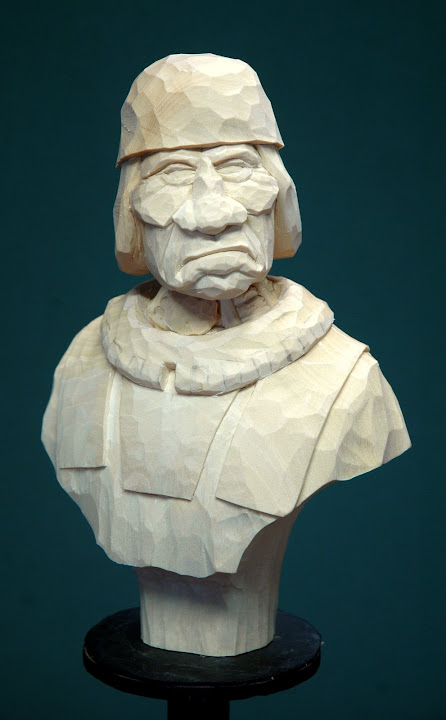
Cheyenne Dog Soldier

-
The skull cap on the head will serve as a base for all those feathers which will be inserted individually. I read where one headdress had a total of 400 feathers so this will be where the challenge comes in. If it works it should really make an impressive piece.
-
I'll keep you posted with photos as this things takes shape. The Road Agent is setting waiting for the varnish to dry so I hope to have him up on the Blog tomorrow. As always your comments are welcomed and appreciated.
Subscribe to:
Comments (Atom)