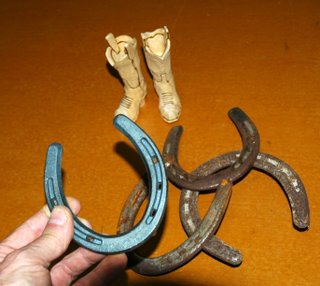
Just a few more steps to go and the Boot project will be complete. First we have to decide on a horseshoe to use. My horse Boomer was kind enough to give me one of his old ones so I will clean it up and use it. A new one will work just as well but make sure you get the proper size..."OO Lite". If you go to the Farm Store to pick one up you'll probably find three sizes: "OOO, OO and O". I'm holding a "OOO" which is normally used for Ponies. These would work great for a smaller carving. You'll need 8 horseshoe nails and they come in boxes of 100. Worse yet, they're not cheap! Maybe you can split the costs with some carving buddies!
Whichever shoe you decide on, old or new, give it a good sanding. If it's an old one clean out the holes and sand off any rust. Make sure it sets level and is not bent to an odd shape. Those Farriers really have to twist and pull to get some of those shoes off the horse.
In the photos attached to this post I explain what stains and finish I use for the wooden mounts and how to put everything together. If you want to put a Nameplate on your finished carving you can get a nice one really fast from www.signsbygwynn.com.
This project has gone pretty quick and, hopefully you now have a piece that you'll be proud to set on your desk or shelf or to pass on to a little Buckaroo you might know. For our next effort we'll try a Saddle and also use the Horseshoe as a base.
Stay tuned!

This was a good one Lynn and really a great project for a beginning carver, altho I have to admit I enjoyed doing it as well...........thanks Dave
ReplyDelete