Monday, March 05, 2007

Magua, The Huron

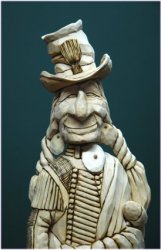
With the Kansas City Woodcarving Show coming up the end of March I've been working on a new bust to enter in competition. The other day I was doing some web-surfing and came across Wes Studi's webpage. If you have seen the movie Last of the Mohicians he played Magua, The Sly Fox, a Canadian Huron. The photos of Wes in the character of Magua were just what I was looking for.

This bust is a little larger than normal as I wanted to be able to do a lot of "attachments" and a smaller version wouldn't have been large enough to support all I have in mind. With the base it stands about 10 inches tall. While the photo shows the carving basically finished I still have to add some more feathers, a nose piece and maybe a couple more rings in the ears. I really want this thing to "pop" when the Judge walks by. I spent the afternoon painting the head and believe me when I say it's definitely going to "pop"!

The feathers will be painted to resemble Turkey tail feathers and there will hopefully be a few Blue Jay feathers added to his topnot. The medallion on the chest gorget will have a peace medal in the center with a couple smaller medals on each side. Once I get him painted I will post the completed photos.

Wes Studi's Website: www.thestudigroup.com

Wednesday, February 14, 2007

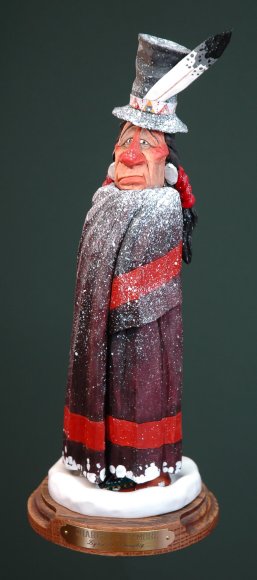
Let It Snow!

Believe it or not I finally got around to finishing this character! I didn't take photos of my painting the figure as we have covered this in other posts. If you have any problems with your paint job just drop me a comment and I'll try and answer any question.

The associated photos pretty well explain the process of splattering white paint all over you carving so I don't really need to cover it here. It's an easy process the only real difficulty being getting up the courage to actually do it! But, I've got faith in you so go ahead and flip those bristles!!

Sunday, February 11, 2007

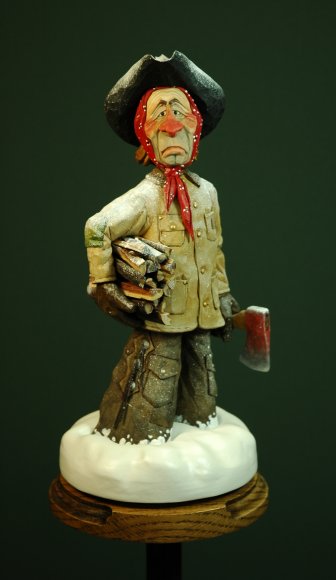
The Woodchopper


This has been a real fun project. I wanted to create a carving showing a Cowboy, who's stuck out in some Line Shack during a cold winter, doing what they surely must have considered the most important chore. I also wanted to try and create the look of pretty deep snow. I have done snow in the past but not this deep and I think it turned out looking pretty good.

I dressed him in my Carhartt jacket, detailed right down to the emblem on the front chest pocket. Unfortunately, the snow storm has pretty well covered it up. Oh well....guess that would have happened in realife. I added a little 1/8" wafer of paneling between the snow and the oak base to give it a revealing break. The snow base you see is a second-effort as the first looked too much like he was standing on a marshmellow. Even looking at it now it sort of looks like a cookie.

I had originally considered having the bandana tied around the hat with the brim pulled down over the ears. However, in trying that out on myself I found that this really gave no protection from the cold so I doubt if they would have done that. A bandana wrapped over the head and ears works good at keeping out the wind and cold.

I hope you enjoy looking this fella over as much as I did creating him. Lots of photos after the jump. Now let's let that wrangler get inside and stoke the stove!

Friday, January 26, 2007

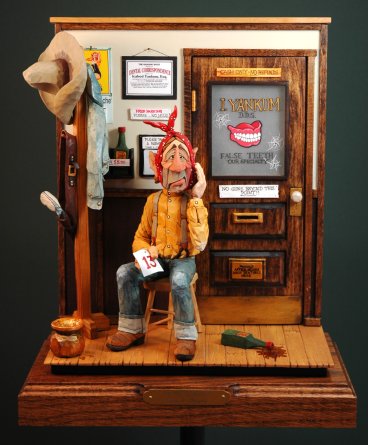
"At The Dentist"


This is my Single Figure Caricature competition piece for 2007, at least until it's sold. Had hoped to show it at the Mesa, Arizona show in February but Mother Nature had different plans.

I spent a lot of time on the details. The glass window in the door is a piece of Lexan that I buffed to make it milky. The bullet holes were drilled and then white paint was used to create the spider-web effect of the bullets impact. A neat trick I'll use again. I created the Diploma on the computer and did the same with the calender. If you really strain your eyes you can read everything on the Diploma. All the other signs were made from thin strips of wood, carved and hand-lettered.

To make the coat stand I used my own gun and holster hanging on a peg as a model, the same with the jacket. When doing things like this you just can't beat working from the actual article. The spilt Pain Killer was made from drops of epoxy painted with Amber Shellac and then coated with epoxy again. Makes the liquid look real thick and gooey which is just want I wanted.

I did the figure first and then built the floor, wall and base. The chair is all pegged together just like a real one. Four pegs in the feet hold the chair and figure to the floor. The figure is pegged to the chair.

It takes a lot of planning to do something like this but once the "room" is built the little details just seem to start showing up. You have to be careful though as too many details will cause the scene to collaspe in on itself to the point that the original concept will be weakened.

Anyway, I hope you enjoy it. Drop me a comment below and let me know what you think.

More photos after the jump to the Gallery.

Tuesday, January 02, 2007

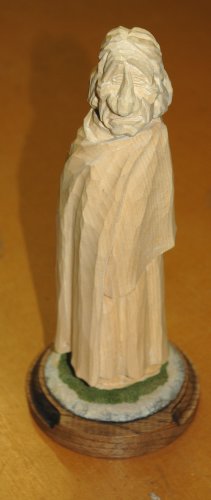
Let's Carve This Fella - Part 3...Making The Base!


Although I did an earlier post on making a Snow base, I've come up with a much simpler way of doing the same thing, eliminating the need to use epoxy resin.

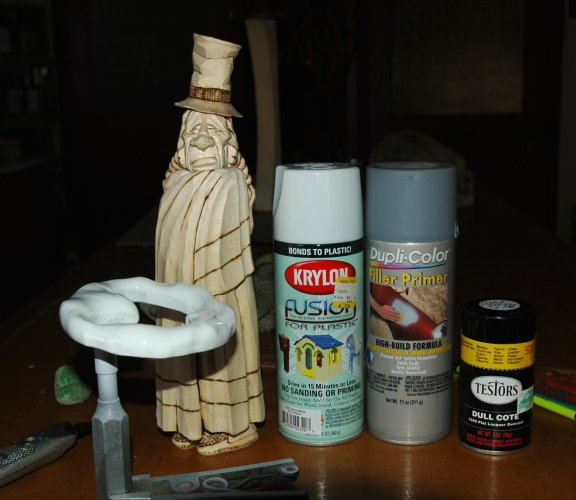
In the photo I show all the materials I used to accomplish this project. They are:

Krylon Fusion Outdoor Furniture Paint. White.
Dupli-Color Spray Primer. Grey
Testors Dull Cote. A flattening spray.
Basswood 1/2"

That outdoor furniture paint works great as it dries pretty fast. It will take several coats of it to get a real smooth finish. Make sure you wait till one coat dries before you spray on the next.

What we're trying to accomplish here is to get a piece of Basswood to look like properly scaled snow. I've seen some of the snow texture material available in craft stores or catalogs but they just don't look right to me. To look good the snow has to look in scale with the figure. When you reduce it to the scale of this figure it would be very smooth without any visible detail. Following the steps outlined will give you that effect. The secret to accomplish this is to sand, sand, sand, and then to sand again!

I didn't cover making the Red Oak Base as we did that in another post. So lets makes some snow!!

Wednesday, December 27, 2006

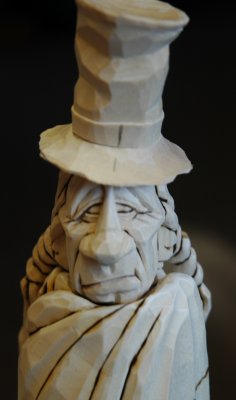
Let's Carve This Fella.....Part 2 - The Head & Hat!


Now that we have the Body of the figure almost completed we can begin on the head and hat. Notice I said the body was "almost" completed. We still have to match it to the head! Remember that it's cold out there so we want his head pulled down into the blanket. To do that will take some extra fitting.

There are a ton of photos associated with this post as I wanted to really go over a number of steps which, I think, really make a good character. Even though we're carving a caricature, facial structure is just as important as when carving a realistic figure. There has to be bone struction to support the features and I'll explain and show this as we move through this lesson.

One important thing about this carving....As he is cold and sad we want the weight of the snow and his other worries to really bear down on him. To show this all lines on the face will curve downward, i.e., the eyebrows, the eyes, the mouth. Even the brim of the hat and the direction of the hat's tip amplify this mood.

As indicated on the original drawing the braids and hat are done seperately as are the feather and the two little ear rings. The braids will be epoxied in place and then carved. The feather and ear pendants will be carved and then glued in place once the figure is painted.

So, we've got lots of ground to cover so we'd better get started!!

Friday, December 01, 2006

Hey! Let's Carve This Fella and Make Some Snow!


As several carvers have ask me to do a post on carving this character I thought I'd just do the whole thing all over again from the beginning so you can follow along and make one of your own.

First, let's see just what the action is with this poor fella standing out in the reservation snow. It's pretty cold outside so he has wrapped himself up in his Government issued blanket. His right arm comes up across his chest and holds the blanket on his left shoulder. You can see his beaded mocs and the top hat he was fortunate enough to trade for. He's added a beaded strip and an eagle feather to spruce it up a bit. Still, as this months beef issue is late as usual he's not to happy about facing the wife once he gets back to the Tipi and she finds out that it's fry-bread for dinner and nothing else. Poor fella!

I've purposely kept this figure as simple as possible as I wanted to concentrate on the painting and snow techniques. We'll do the top hat and braids separately to make it even easier. Doing the braids separate will let us keep them down tight against the blanket so they look natural. I've drawn out the front profile only as I think you can figure out the side by yourself. The body without the head is 8" tall and 3" wide. You can resize it if you want but this size makes a nice little presentation.

As I've done this character already don't be surprised if this one will be a little different. That's okay! Even I don't like copying my own work! A little change here and there will make the new one unique from the old and that's always a good thing to strive for. Also, I've figured out a better and much easier way to make the snow base. So, let's get started.

Tuesday, November 28, 2006

Making A Base For Your Carving!


Just as a picture or photograph needs a frame to make it look good, a carving needs a base to really set it apart. The following steps will show you how I go about making a simple base for one of my figures. Although it might look a little complicated at first after you do it a couple of times it's really a snap to do. I hope it's helpful to you.

Tuesday, November 07, 2006

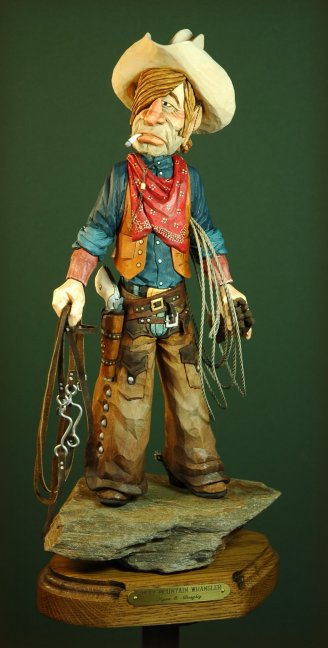
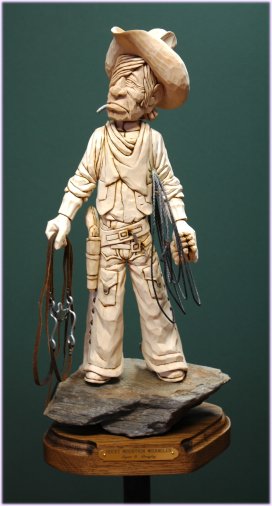
Rocky Mountain Wrangler


Here is my latest piece. I had hoped to get him completed before the woodcarving show in Dayton, Ohio but it was not to be. I'll post the painted photos once I get back.

He is mounted on a piece of the Rockies that my wife and I picked up while on a drive through the Rocky Mountain National Park this past September. I drilled the mounting holes into the rock with a carbide bit and he will be epoxied in place once he's painted.

To get the lasso under his left arm I did the arm as a separate piece, carved a notch for the rope and then epoxied and glued everything in place. Once everything had dried I carved the epoxy that had squeezed out to match the wooden surface. A nice looking effect. He's holding his gloves in the left hand and in the right his mounts bit, headstall and reins. Once he's painted the rock should really stand out.

I did forget a small item on this piece and if someone guesses it I'll confess what is missing. Otherwise, it will remain unknown. Let's see how sharp your observation is. (No...it's not the buttons on his vest or shirt...I'll paint those on later.)

Update: Here's the piece completed. He turned out pretty nice but I'm not completely happy with his pose. He could have appeared a lot more relaxed if his arms were hanging not so far forward. While arms have a natural bend at the elbow when hanging relaxed at the side they don't project forward as much as they do in this piece. Oh well.....it's a learning process so I'll remember this when doing any future pieces.

The part that I forgot has been added on as his gun would be useless with out some bullets.

More photos in the gallery.

Friday, October 27, 2006

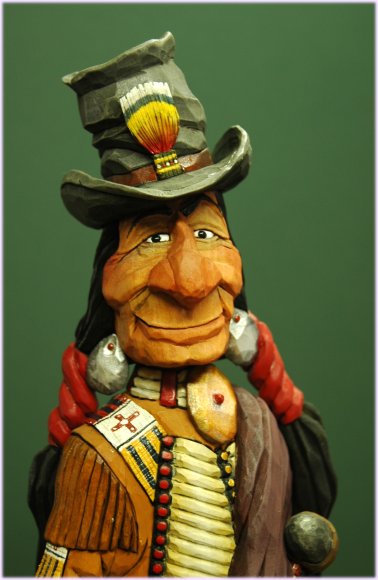
Charlie Red Hawk


Who says carvings of Native Americans are always frowning? Charlie Red Hawk ought to help put those thoughts to rest. He's a good natured fella on his way to the Ottawa Stomp Dance being help at the new dance grounds outside of Wyandotte, OK. The old grounds are being replaced by another Casino. Maybe that's why he's smiling. They say those casinos are "Red Man's Revenge".

There are photos of Charlie naked and then decked out in all his colors. He really turned out good. I love painting Indians as you can add just about as much color as you want and it all looks good. I've used this basic blanket-wrapped body shape over and over and it always looks different than the last time. I really like the crumpled hat as it gives him a lot of character.