Tuesday, August 08, 2006

Road Agents at Prairie Dog Junction!


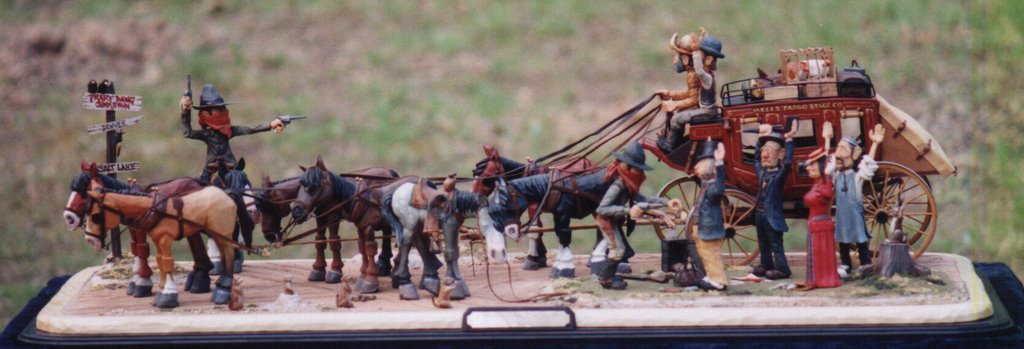
Here is a scene I did several years ago which is on display in the Out West Gallery. It depicts a holdup at Prairie Dog Junction. I borrowed the idea for this one from a Charlie Russell painting I saw at the Russell Museum in Great Falls, Montana. Lots of detail here.

The Coach was constructed using a set of full-sized blueprints. It's built to scale and even the interior is detailed with jump seats, curtains, etc. The Coach body is supported over the frame with real leather throughbraces, just like the real ones. However, I had to permanently anchor it to the frame as it wiggled during movement, again like the real ones.

The horse team is called a "Six-Up" as six animals are used. The harness is correct for such a rig as are the corresponding 'trees' which tie them all together to the wagon. From what I've read and seen it really took a lot of experience and strength to handle such a hook-up.

I've attached a lot of close up photos so you can get a real feel of the action taking place along this lonely stretch of road. One thing for sure....those little Prairie Dog's do not appreciate the load that cayuse has just deposited in front of their doorstep!

Friday, July 28, 2006

The Importance Of Details! - Grunt Work!


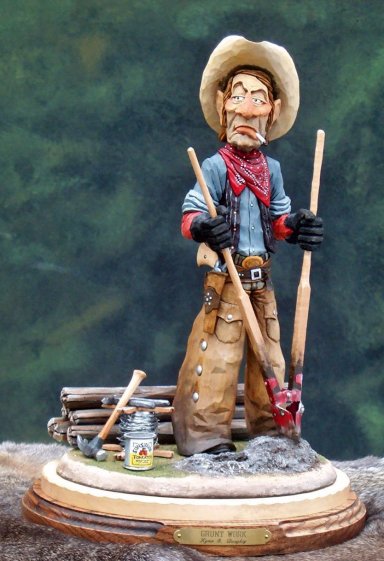
I have attached a number of photos of a carving I did a couple of years ago which, I think, illustrates the importance of adding details to your carvings to carry the theme of just what you're trying to capture. Having strung a barbedwire fence around our property a few years back I can symphathize with the attitude of this Cowpoke. It's not fun! However, it does make a good and amusing subject for a caricature carving.

The first step in creating this piece was the construction of the Post-Hold Diggers. I brought my diggers into the shop and worked up a cardboard pattern of the metal part of the blades. I then cut two blades out of some thin tin and bent them to shape. After whittling down the handles and putting the pieces together the thing worked just like the real one! Neat! The barbedwire was made by wrapping wire around finished spool and then adding barbs to the last foot or so. The hammer...well, it's just a hammer. The fence pliers were made to match the ones I used when putting up my fence. The staples are just bent pieces of wire and the can was made like I made the cup for the Chuckwagon Cook. The label on the can was painted and then applied.

If you could look down from the top you'd see that the hole he is digging goes down almost all the way to the bottom of the lower base. I put all the pieces together before any finish was applied and drilled the hole. I spent a lot of time on the figure to make it match the digger. To do that I carved the arms and hands separate so the hands could be rotated to match the digger. It would have been almost impossible to do it otherwise.

All in all it turned out to be a real 'classic' and was given as a Christmas Present to a Rancher in West Texas. It was kind of expensive and he kept coming back to look at it over and over during the three days we were at a show in Amarillo. About ten minutes before the show closed he came back one more time and I was sure he was going to carry it off. He didn't! However, about 5 minutes later his wife showed up and made the purchase. She later told me that on Christmas day he about passed out when he opened the box. He said it was the best gift he'd ever received. It's events like that that make carving worthwhile. Not for the money received but for the reward of something you created being really appreciated

Wednesday, July 26, 2006

Western Saddle - The Final Touches


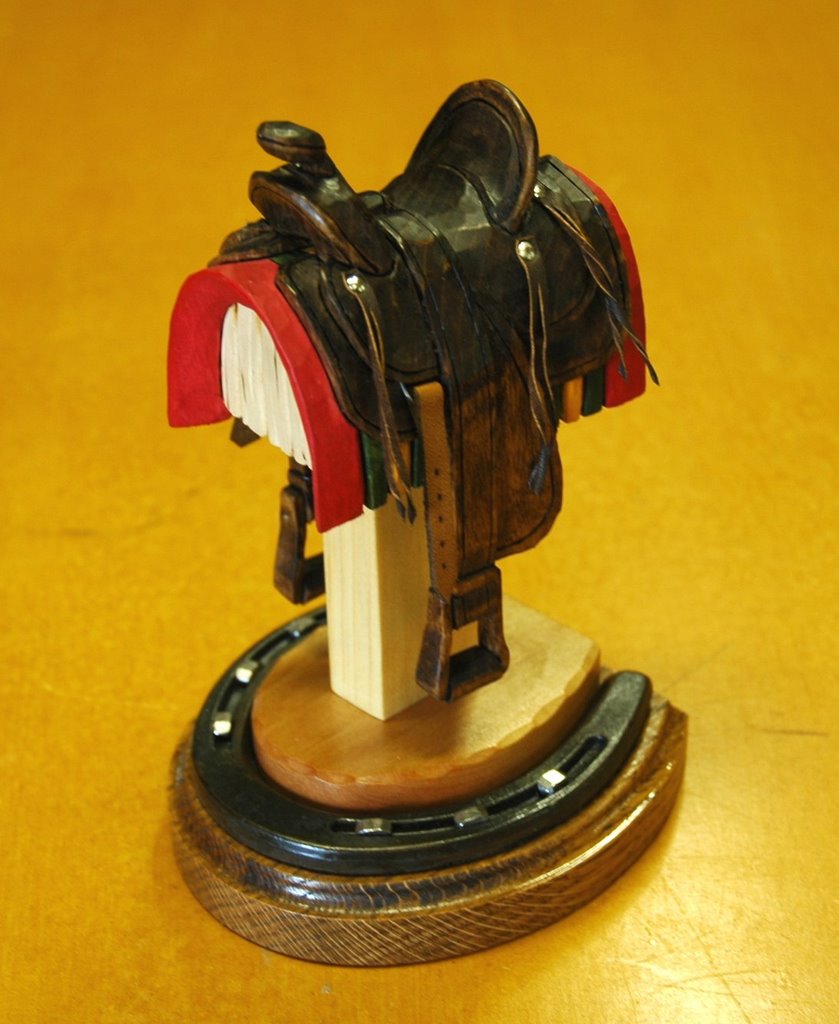
With this post we complete the Western Saddle. While this is a fairly easy and small project I think it makes a nice little carving to set on a shelf, table or desk. As I said earlier, there are all kinds of saddle designs so, with this basic blank you can carve just about any one of them.

The silver conchos which hold the ties are decorative nails you can find at Lowes or Home Depot. The leather I used for the ties came from a women's leather coat I bought at a thrift store back in the 70's! It's very thin and I've used it for different things to numerous to mention. Only paid $20 for it and still have enough 30 more years!

I hope you've had fun with this project. I also hope you've picked up a little knowledge about the Western Saddle, it's different parts and just how it goes together. Later on we'll try and carve a horse to put under it!

Sunday, July 23, 2006

Carving The Saddle


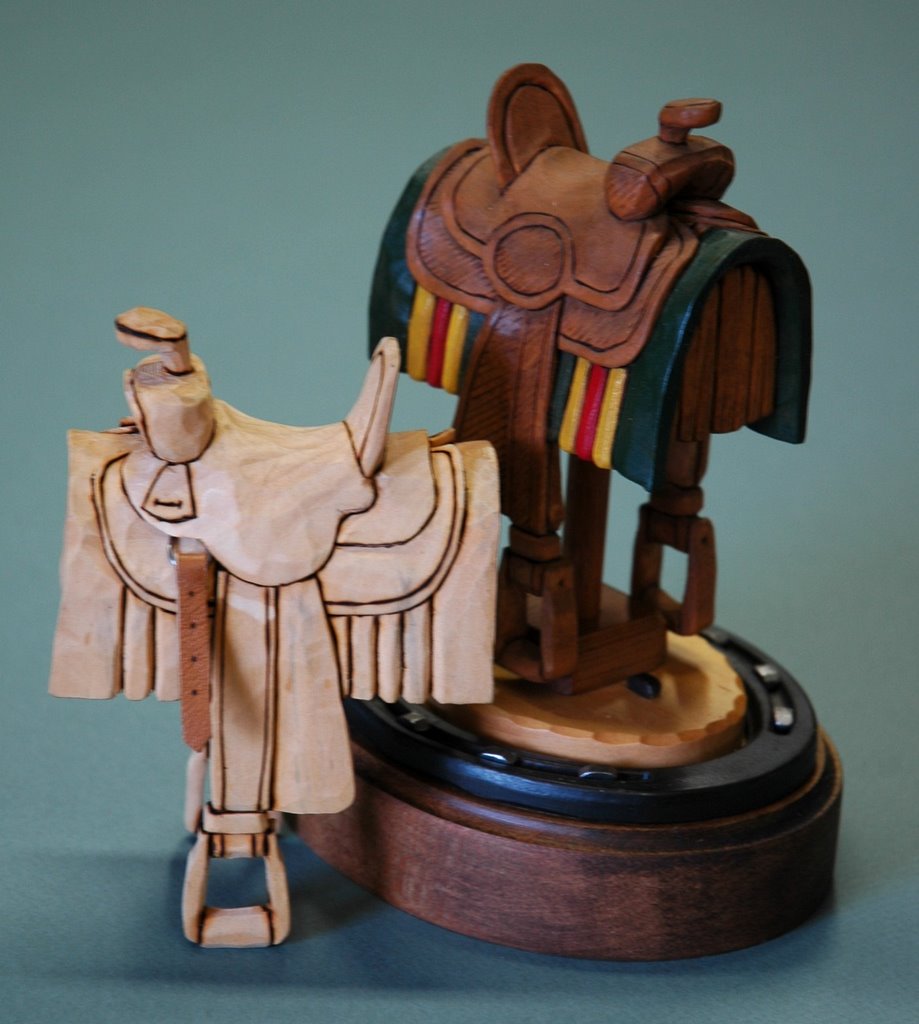
You will note right off that this saddle design is different from the two saddles in the previous post. Saddles, like a lot of things, come in all shapes and sizes. This saddle is known as a Half-Seat style as the stirrup leathers and fenders come up over the top of the seat jockeys. If you're wondering what all these terms mean you are just going to have to do some research. I suggest you do a web-search by typing in "Western Half Seat Saddle" and then do an Image search. You will get all kinds of photos showing all kinds of details. Just pick the ones you like. That's exactly what I did. This type of saddle isn't used much anymore. It's a true Oldtimer. By doing a Full Seat saddle you can eliminate a lot of the carved detail on the top of the seat.

There are lots of photos for this post, two pages worth! I've also been having a problem with the Album associated with this post moving around on me. So you might have to page through the entire list of albums to find it. If it's not at the top it's probably found it's way to the bottom!

The next post will deal with mounting the saddle on the base and finishing it up.

To be continued.......

Wednesday, July 19, 2006

Let's Carve A Saddle!

Got that knife sharpened and ready for some carving? Okay! Let's get started!

In the photos associated with this post you will find the pattern for the Saddle to the left. I've given both the side and front profiles. It's going to take a pretty thick piece of wood so some of you might have to do a little glue-up before you start.

In cutting the blank you will need a Bandsaw that has a 6" cutting capacity. Hopefully, this won't present a problem. Also, be extremely careful when you cut this blank, especially on the end profile. A Bandsaw that is opened to accept a wide piece of wood will grab it if you aren't careful. So get a good grip on the blank and keep your fingers far from the blade. Follow my cutting process and you shouldn't have any problems.

Saddles come in many styles but as this is in the Caricature style we have a little more latitude than someone carving one to scale. Still, we want it to look like a saddle so we'll try and make sure it has all the parts a regular saddle has. I've turned the Stirrups so they hang straight to make the carving a little easier for beginners and we will make the Girth strap out of leather to keep it simple. We will also use the same style of base for the Saddle as we did on the Boots. That metal Horseshoe really ties everything together.

Now, before you begin, I'd like you to do a little homework. Go to the Google Search Window over on the right side of this post and type in "Western Saddle" and do a little research to learn about just what you will be carving. Some of you probably own horses and already know all about this piece of Cowboy gear. For those of you who don't a little trip around the Internet will give you a lot of information that will help you complete this project. Just a suggestion!

So...Let's get started!

To be continued.......

Tuesday, July 18, 2006

Don't Go Roping During A Storm!!


As I've been a little slack on my posting, I thought I'd better put something up or run the risk of losing my subscribers!

Here is a figure that everyone seems to get a kick out of. The idea came to me one day while I was setting at my carving station staring at a head I'd carved and wondering what it would look like if I took a butane torch to it. After the head was pretty well blackened by the flame the light came on and I immediately started carving the figure.

I never actually put the flame to this figure but used flat black to indicate the scorched areas. The yellow slicker was given numerous coats of gloss polyurethane to make it look as wet as possible to contrast the flat finish on the blackened areas. That technique worked pretty well. I did go ahead and paint the entire figure before applying the black so the actual flesh of the face and other areas would peek through. I placed him standing in a puddle of water, clear resin, to carry the theme as much as possible.

The umbrella was made from wire with the burnt cloth pieces made from pieces of copper sheeting soldered to the frame. The little balls on the ends are beads glued on. His rope is twisted wire and I dripped some clear epoxy on it so it would look like water dripping.

Wednesday, June 28, 2006

Indians!


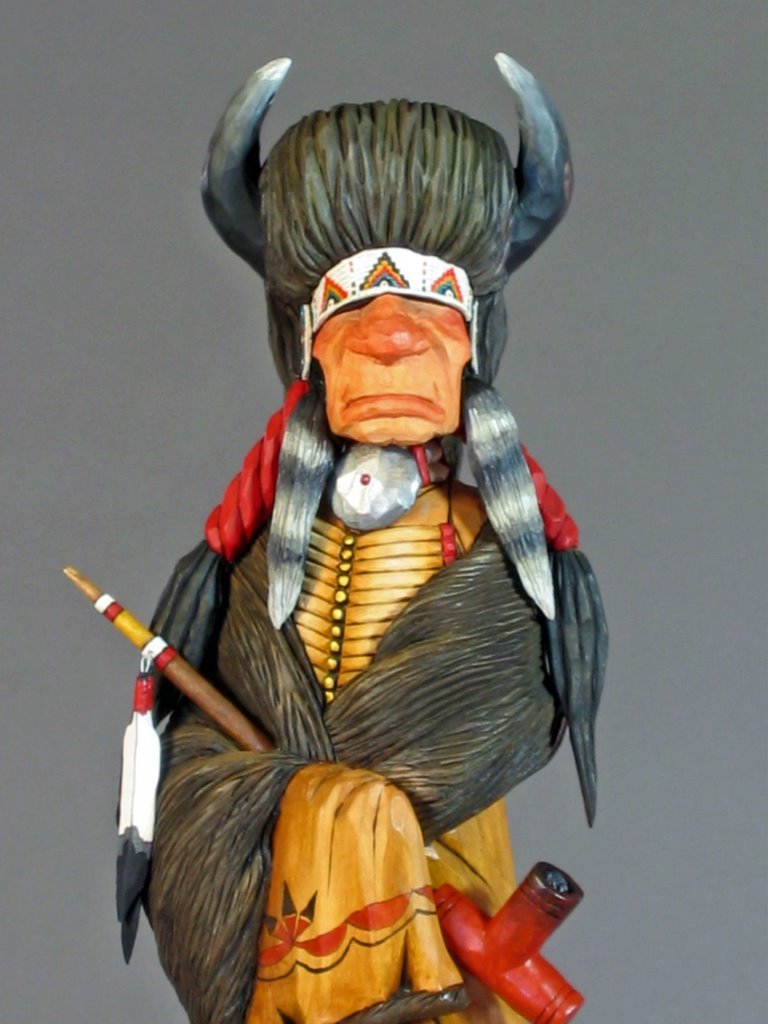
I'm a little busy at the moment getting ready for the Eastern Oklahoma Woodcarving Show in Tulsa on July 7 and 8 so I thought I'd post some photos of Native Americans I've done over the years. For some reason, caricature woodcarvers seem to ignore this genre of figures. Maybe they're afraid of being not quite political correct. I note that you don't see too many caricature carvings of African-Americans either. Too bad. Both the Native American and the African American are rich in detail and theme.

One thing I think you'll note about my carvings of the Native American or any other class of character is that I don't make fun of them. Sure, I'll do them in a caricature style but, as I've always thought and said, you can still show a proper amount of respect toward the figure and still be amusing. A lot of carvers use a 'Mad Magazine" approach to carving, showing their figures in poses and scenes that can be in poor taste and sometimes downright disgusting. I've never seen the fun in doing that.

Anyway, here are a few Indians I've enjoyed doing over the years. I proud to say that almost everyone of them has left the reservation.

Sunday, June 18, 2006

Cowboy Boots ....Making the Mount


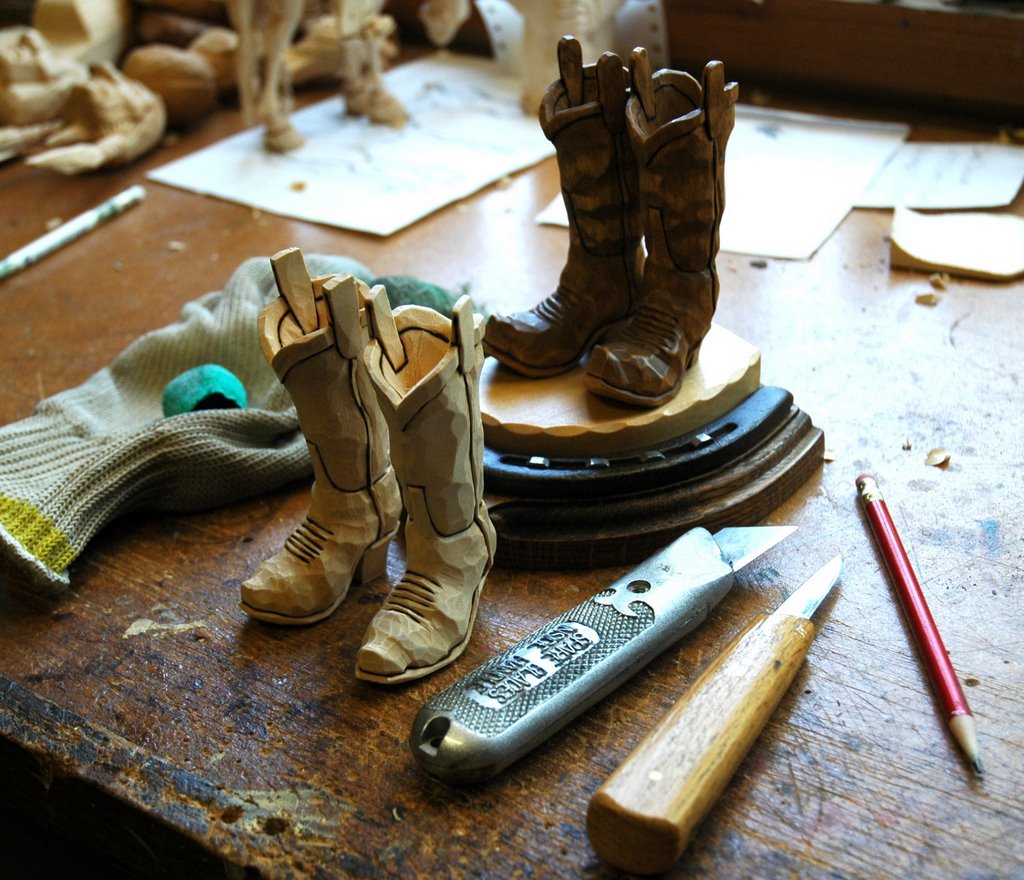
Just a few more steps to go and the Boot project will be complete. First we have to decide on a horseshoe to use. My horse Boomer was kind enough to give me one of his old ones so I will clean it up and use it. A new one will work just as well but make sure you get the proper size..."OO Lite". If you go to the Farm Store to pick one up you'll probably find three sizes: "OOO, OO and O". I'm holding a "OOO" which is normally used for Ponies. These would work great for a smaller carving. You'll need 8 horseshoe nails and they come in boxes of 100. Worse yet, they're not cheap! Maybe you can split the costs with some carving buddies!

Whichever shoe you decide on, old or new, give it a good sanding. If it's an old one clean out the holes and sand off any rust. Make sure it sets level and is not bent to an odd shape. Those Farriers really have to twist and pull to get some of those shoes off the horse.

In the photos attached to this post I explain what stains and finish I use for the wooden mounts and how to put everything together. If you want to put a Nameplate on your finished carving you can get a nice one really fast from www.signsbygwynn.com.

This project has gone pretty quick and, hopefully you now have a piece that you'll be proud to set on your desk or shelf or to pass on to a little Buckaroo you might know. For our next effort we'll try a Saddle and also use the Horseshoe as a base.

Stay tuned!

Thursday, June 15, 2006

Cowboy Boots....Finishing Up The Carving!


With this post we finish up the carving part of this project. Lots of photos to help you along. We're going to be following a lot of pencil lines with our knife blade. When you do this try and remember this basic rule in woodcarving: If at all possible, never cut straight into the surface of your carving. Just by giving a slight angle to you cut you will lessen the risk of edges breaking off or crumbling. Also, with lots of practice, you should try and make a cut a 'one time only' affair. Having to go back and redo a cut previously made will almost always weaken that area and leave you with a sloppy looking carving. Try and develop the skills of a Chip Carver who only makes the cut one time.

So, take your time and have fun!

To be continued......

Cowboy Boots....Roughing Them Out!


There are a lot of photos associated with this post to show you just about every cut I made on that boot blank to the left. Except for cleaning out the shaft hole, I did this entire carving with just my box knife. So, when someone brags about their $45.00 carving tool, maybe you can tell them about your $1.75 wizard!

Make sure you wear a glove and thumb protector when doing this project. You'll see me switch to a new thumb guard about half way through. Protective tape is cheap compared to the pain and downtime of a bad cut so if they start to get a little thin ... out they go! Also, note the frayed ends of my gloves fingers. Imagine what my digits would look like if I forgot to slip the glove on! OUCH!!!!

So, let's get started!

To be continued.........